Tags:
Here's my collection of knit toruses/tori. They present an interesting challenge to knit, as they require a fair degree of manipulation, coming from a variety of methods of execution, detailed below.
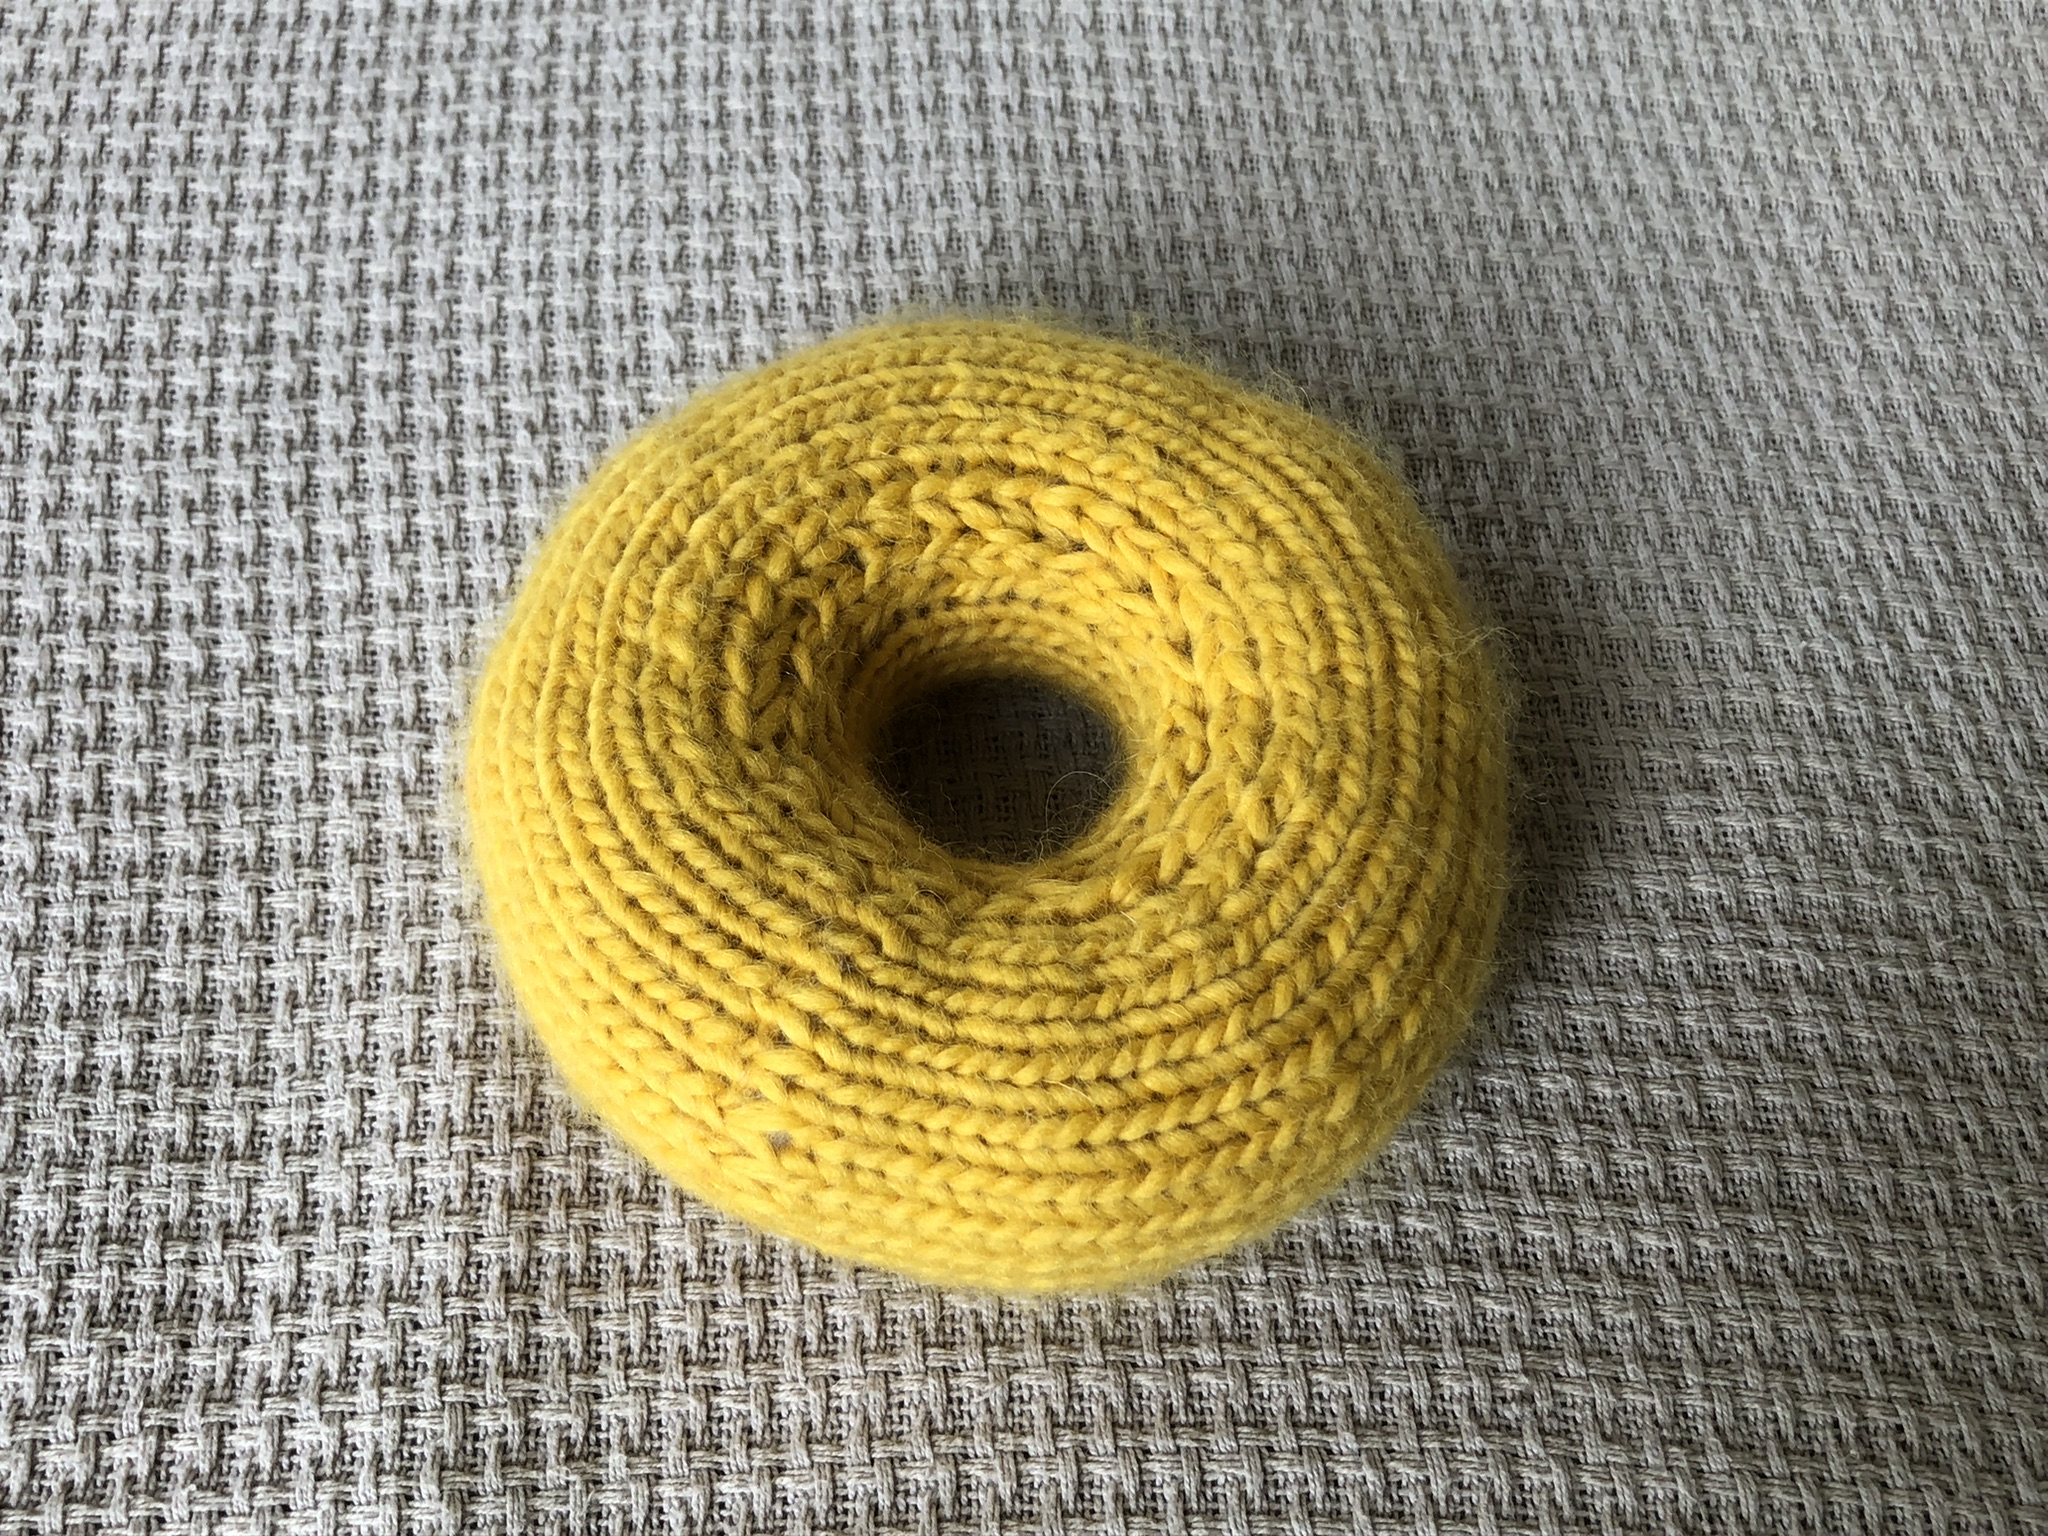
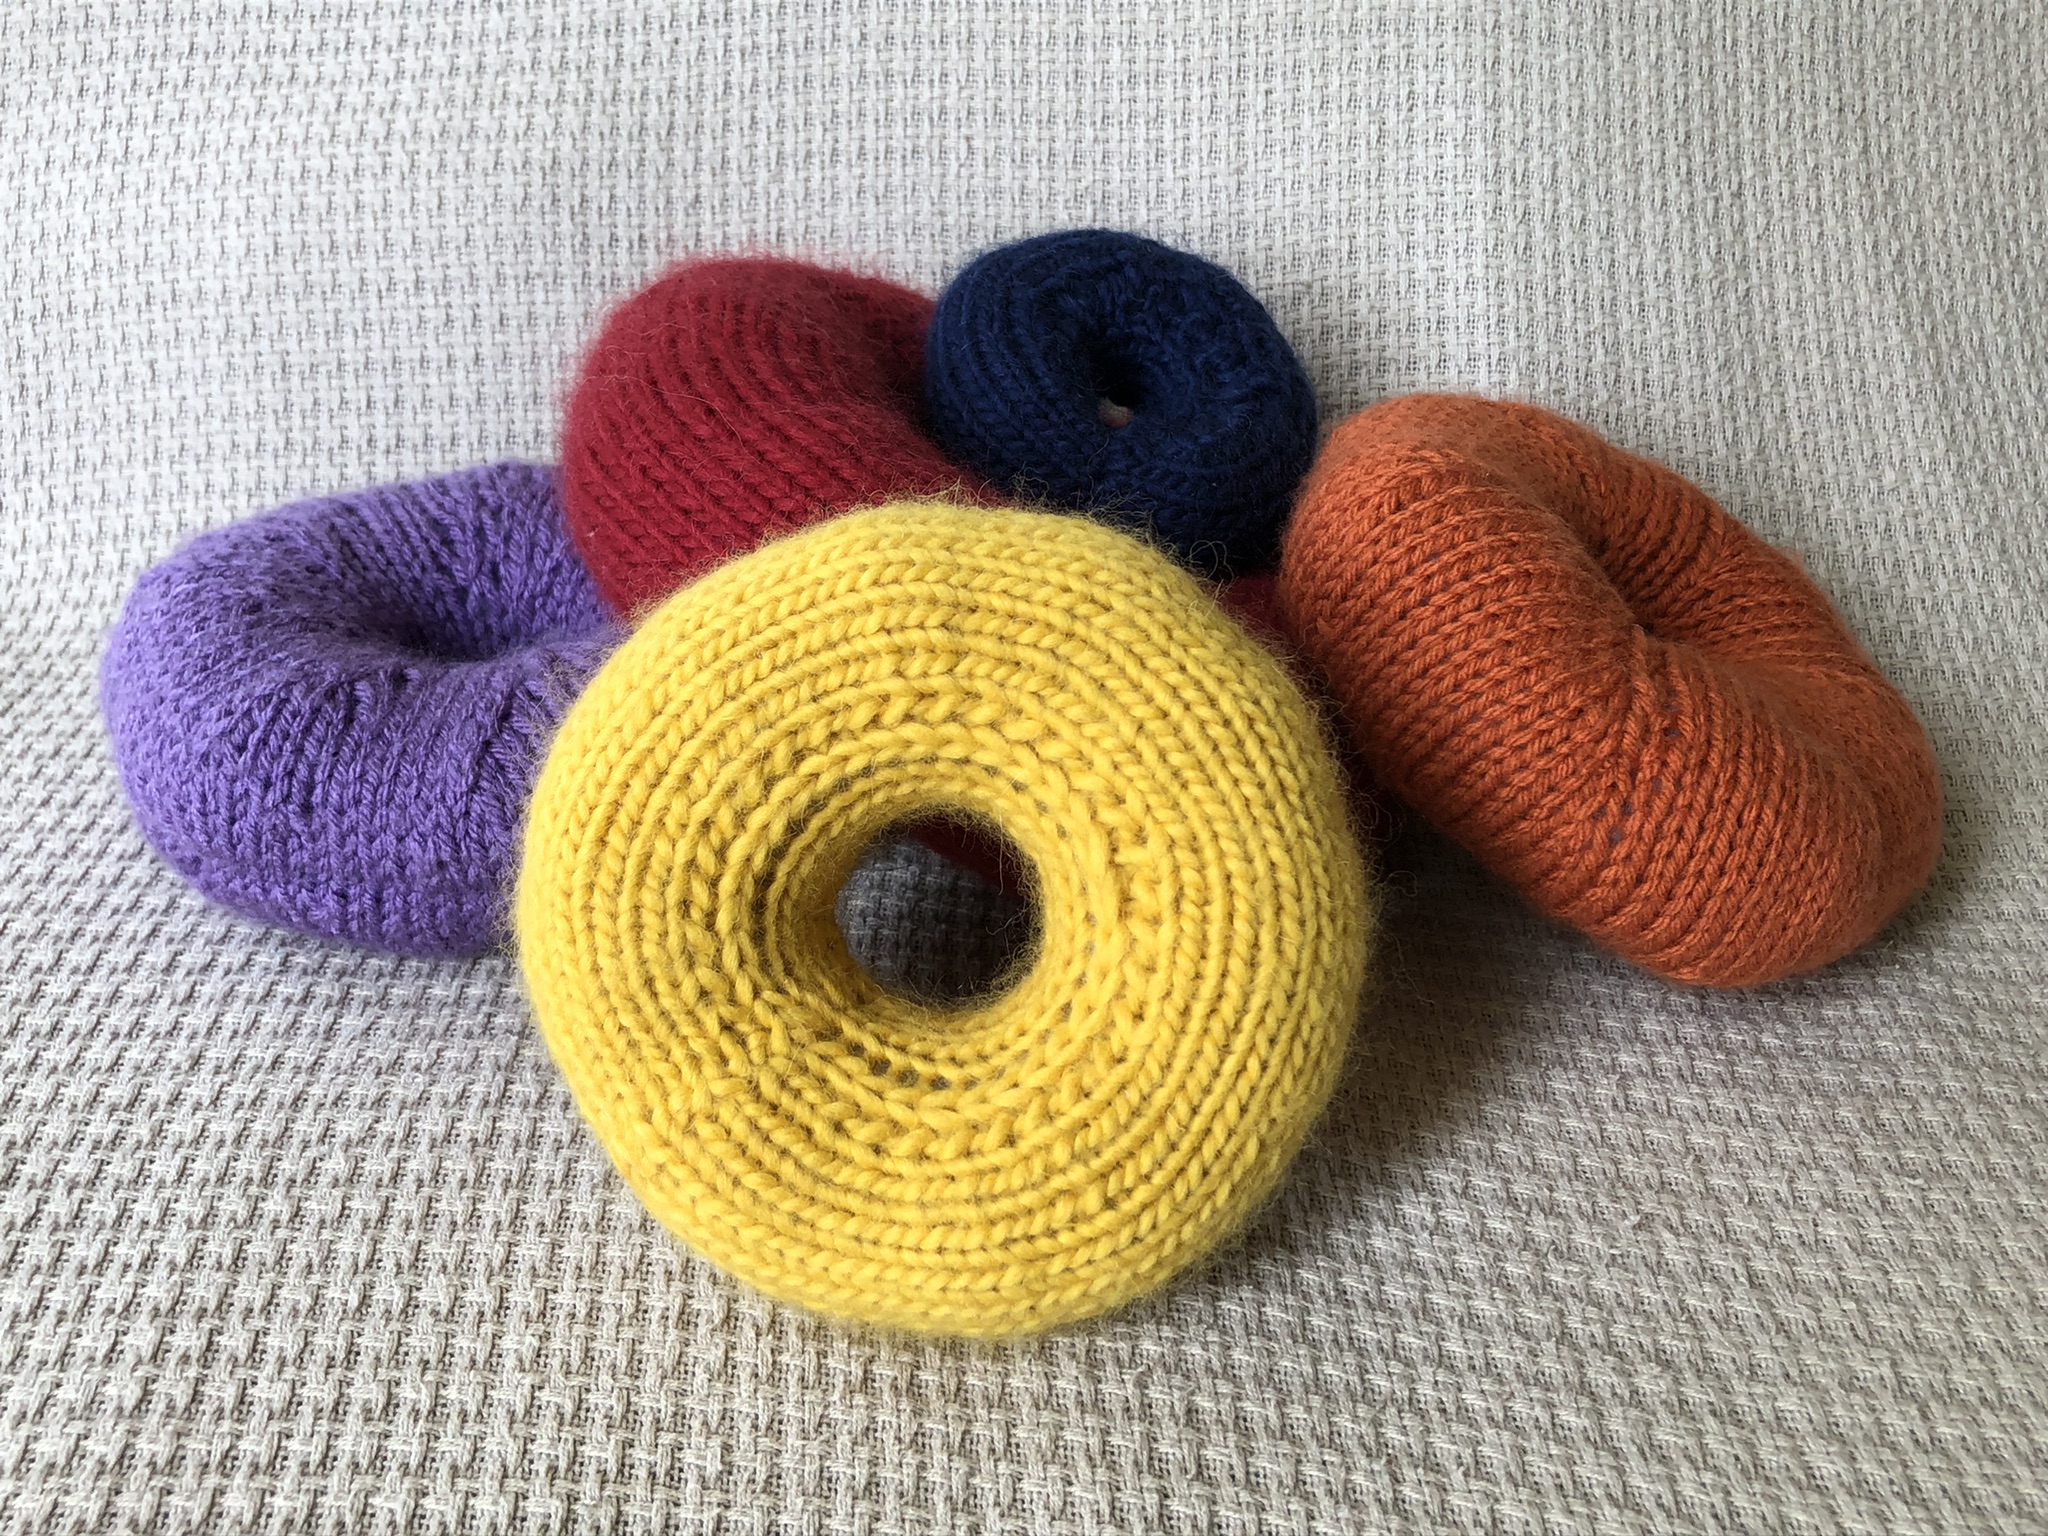
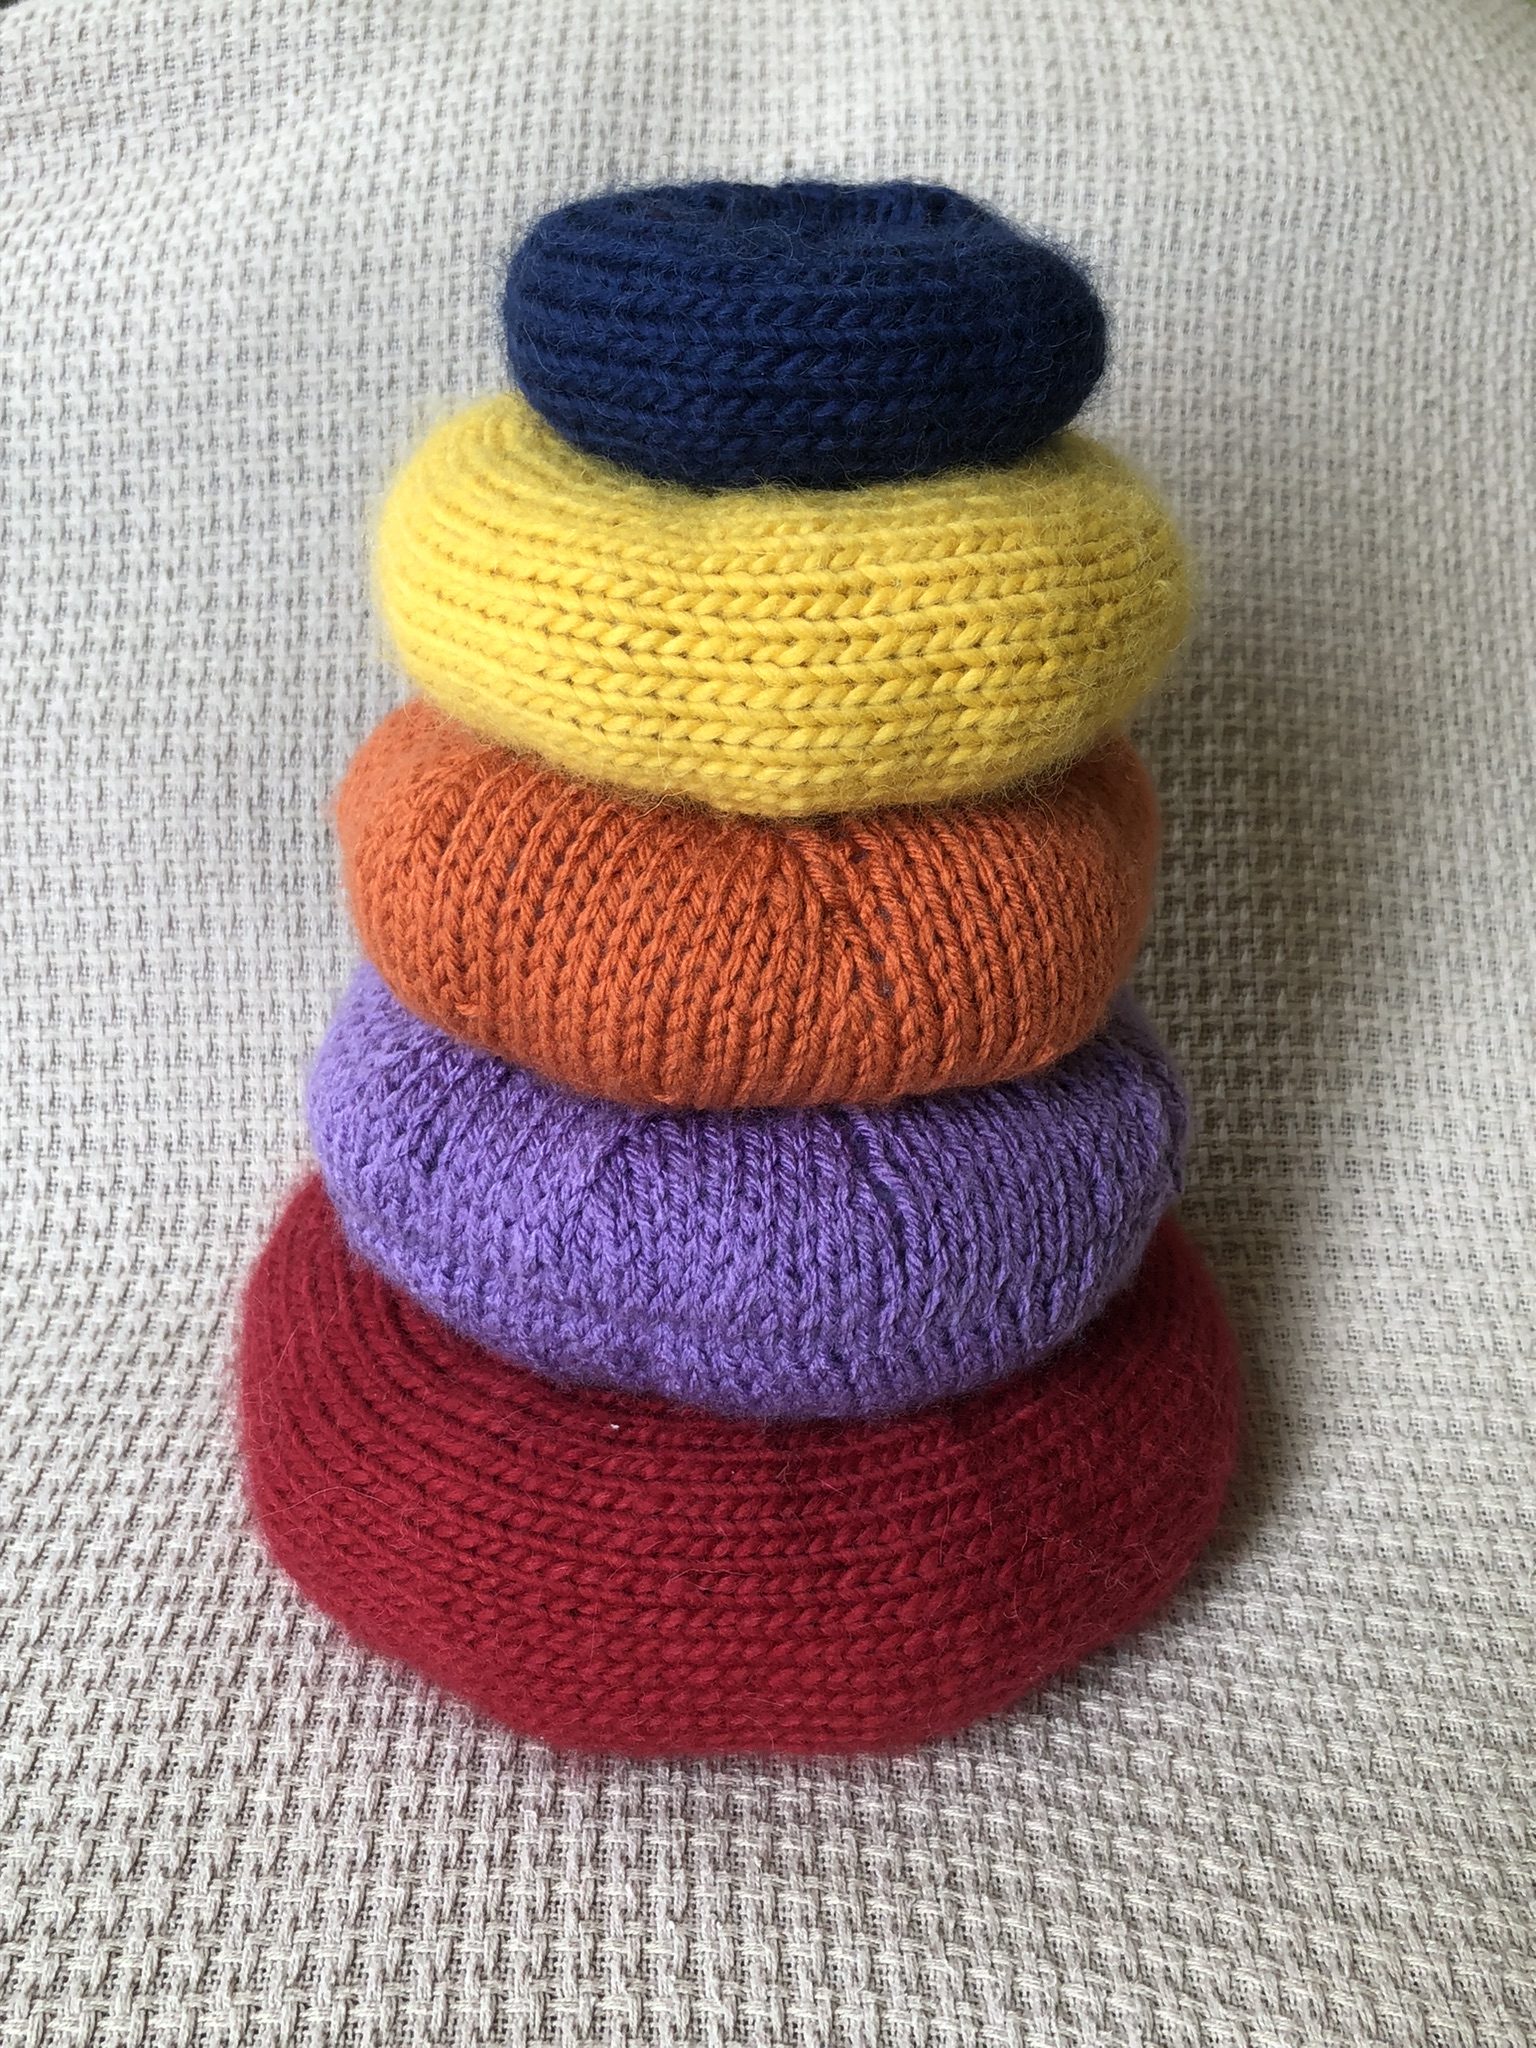
Yellow Torus. Outer diameter: 5.5in. Inner diameter: 1.5in. Method: rectangle. Maybe my favorite torus. Very neat all around, but not perfect.
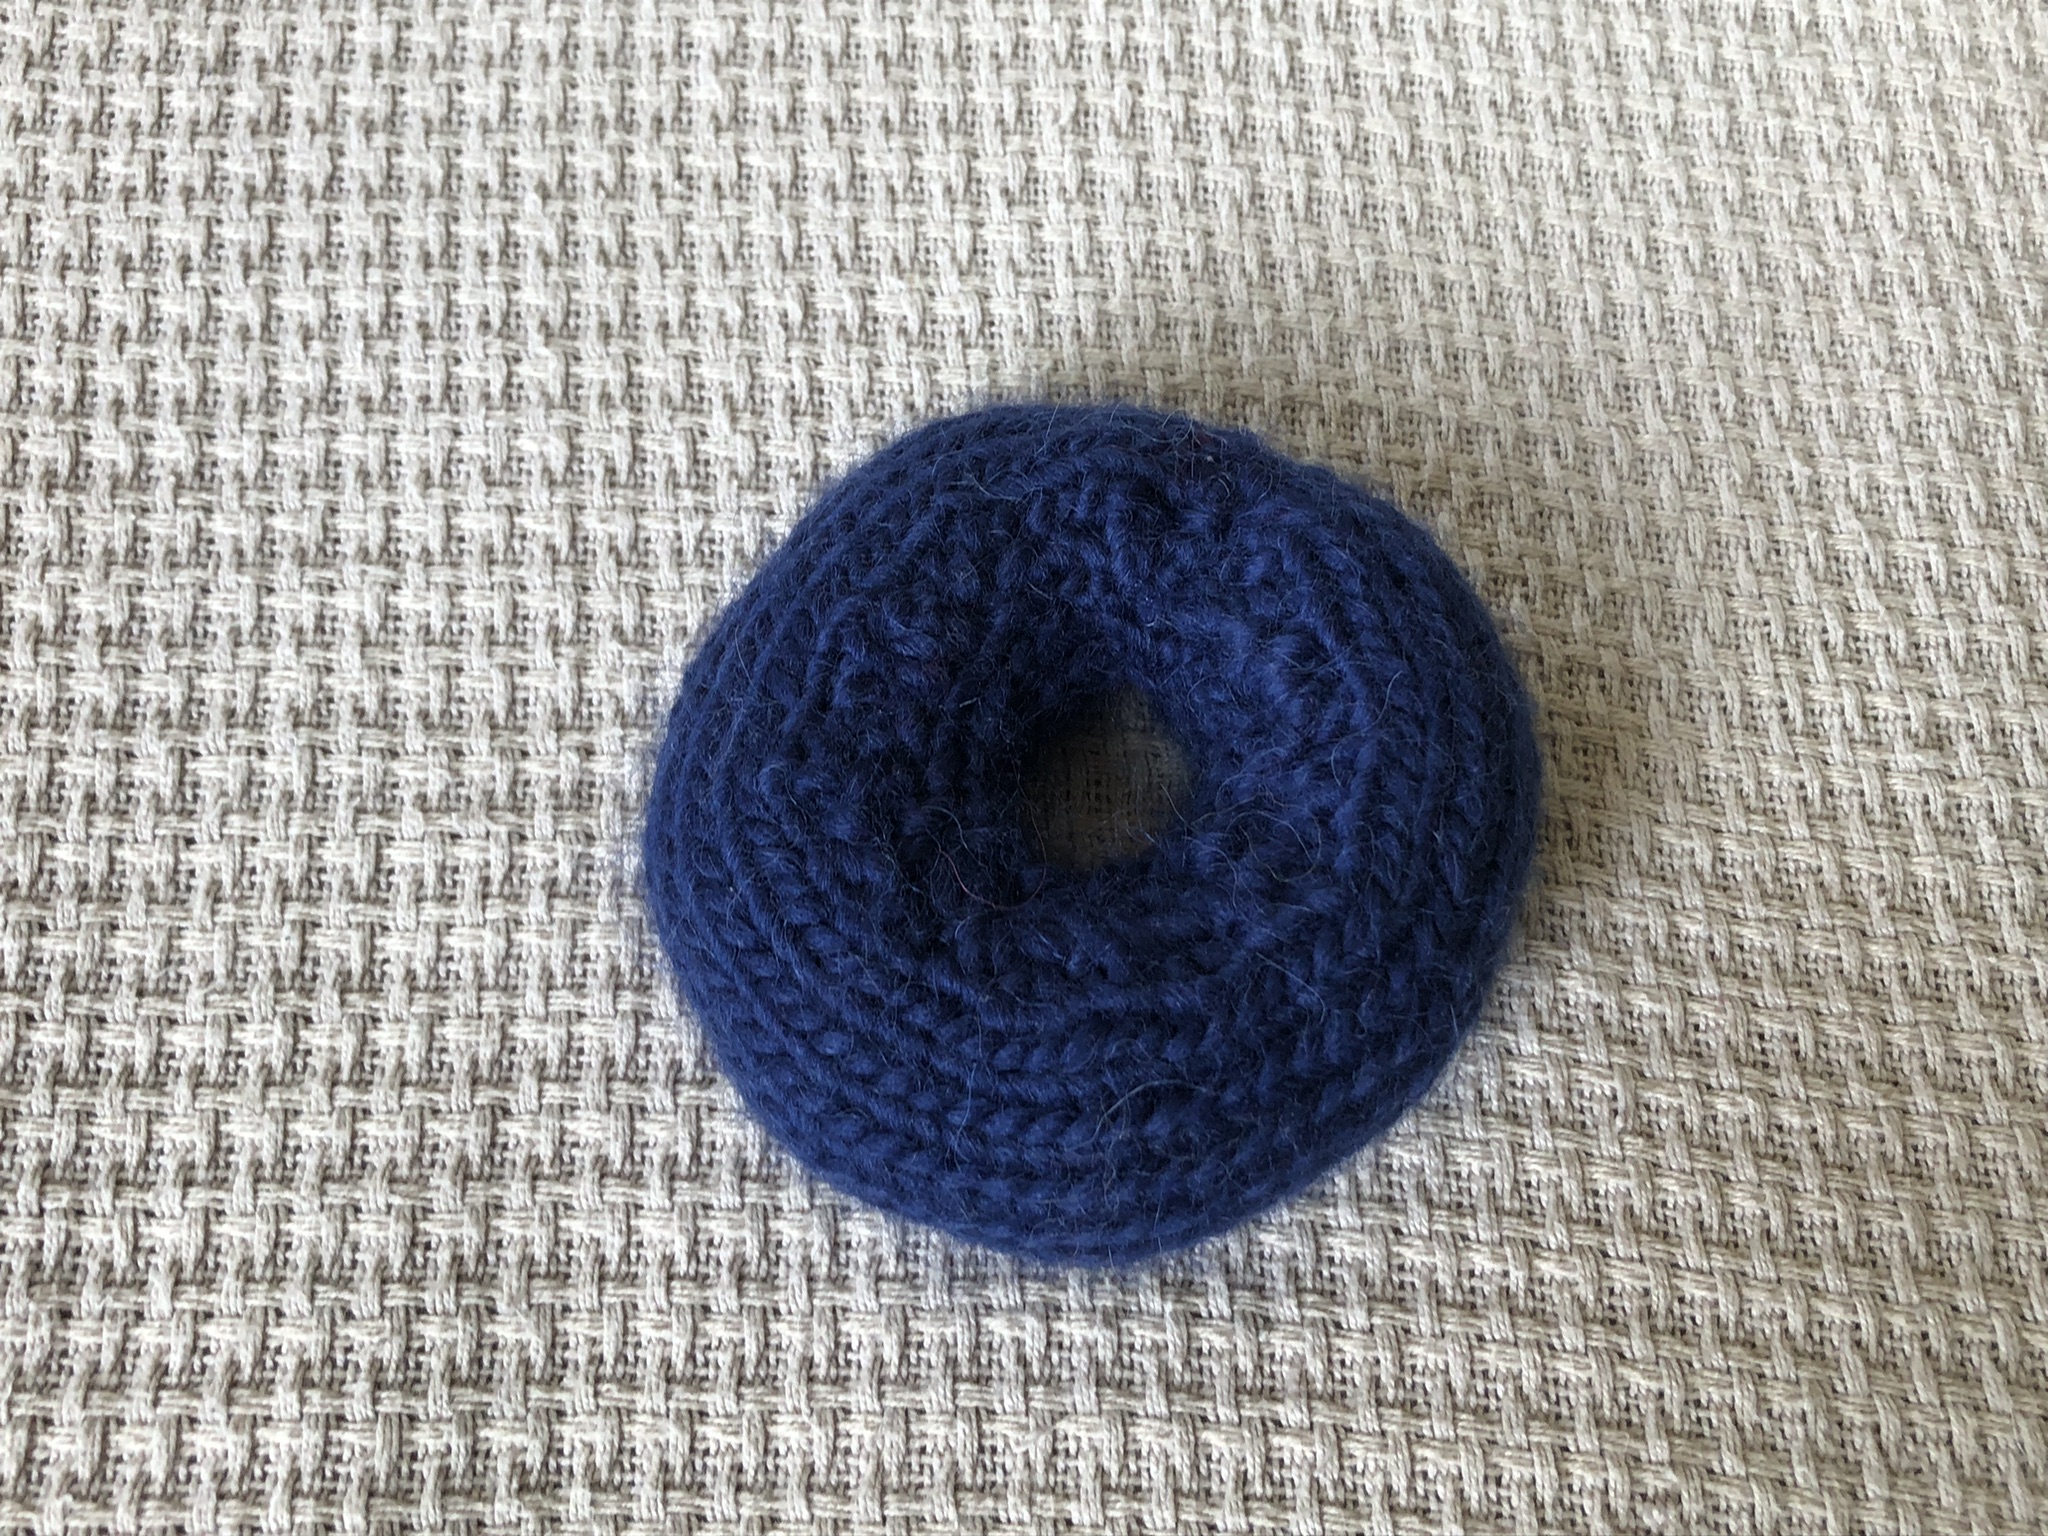
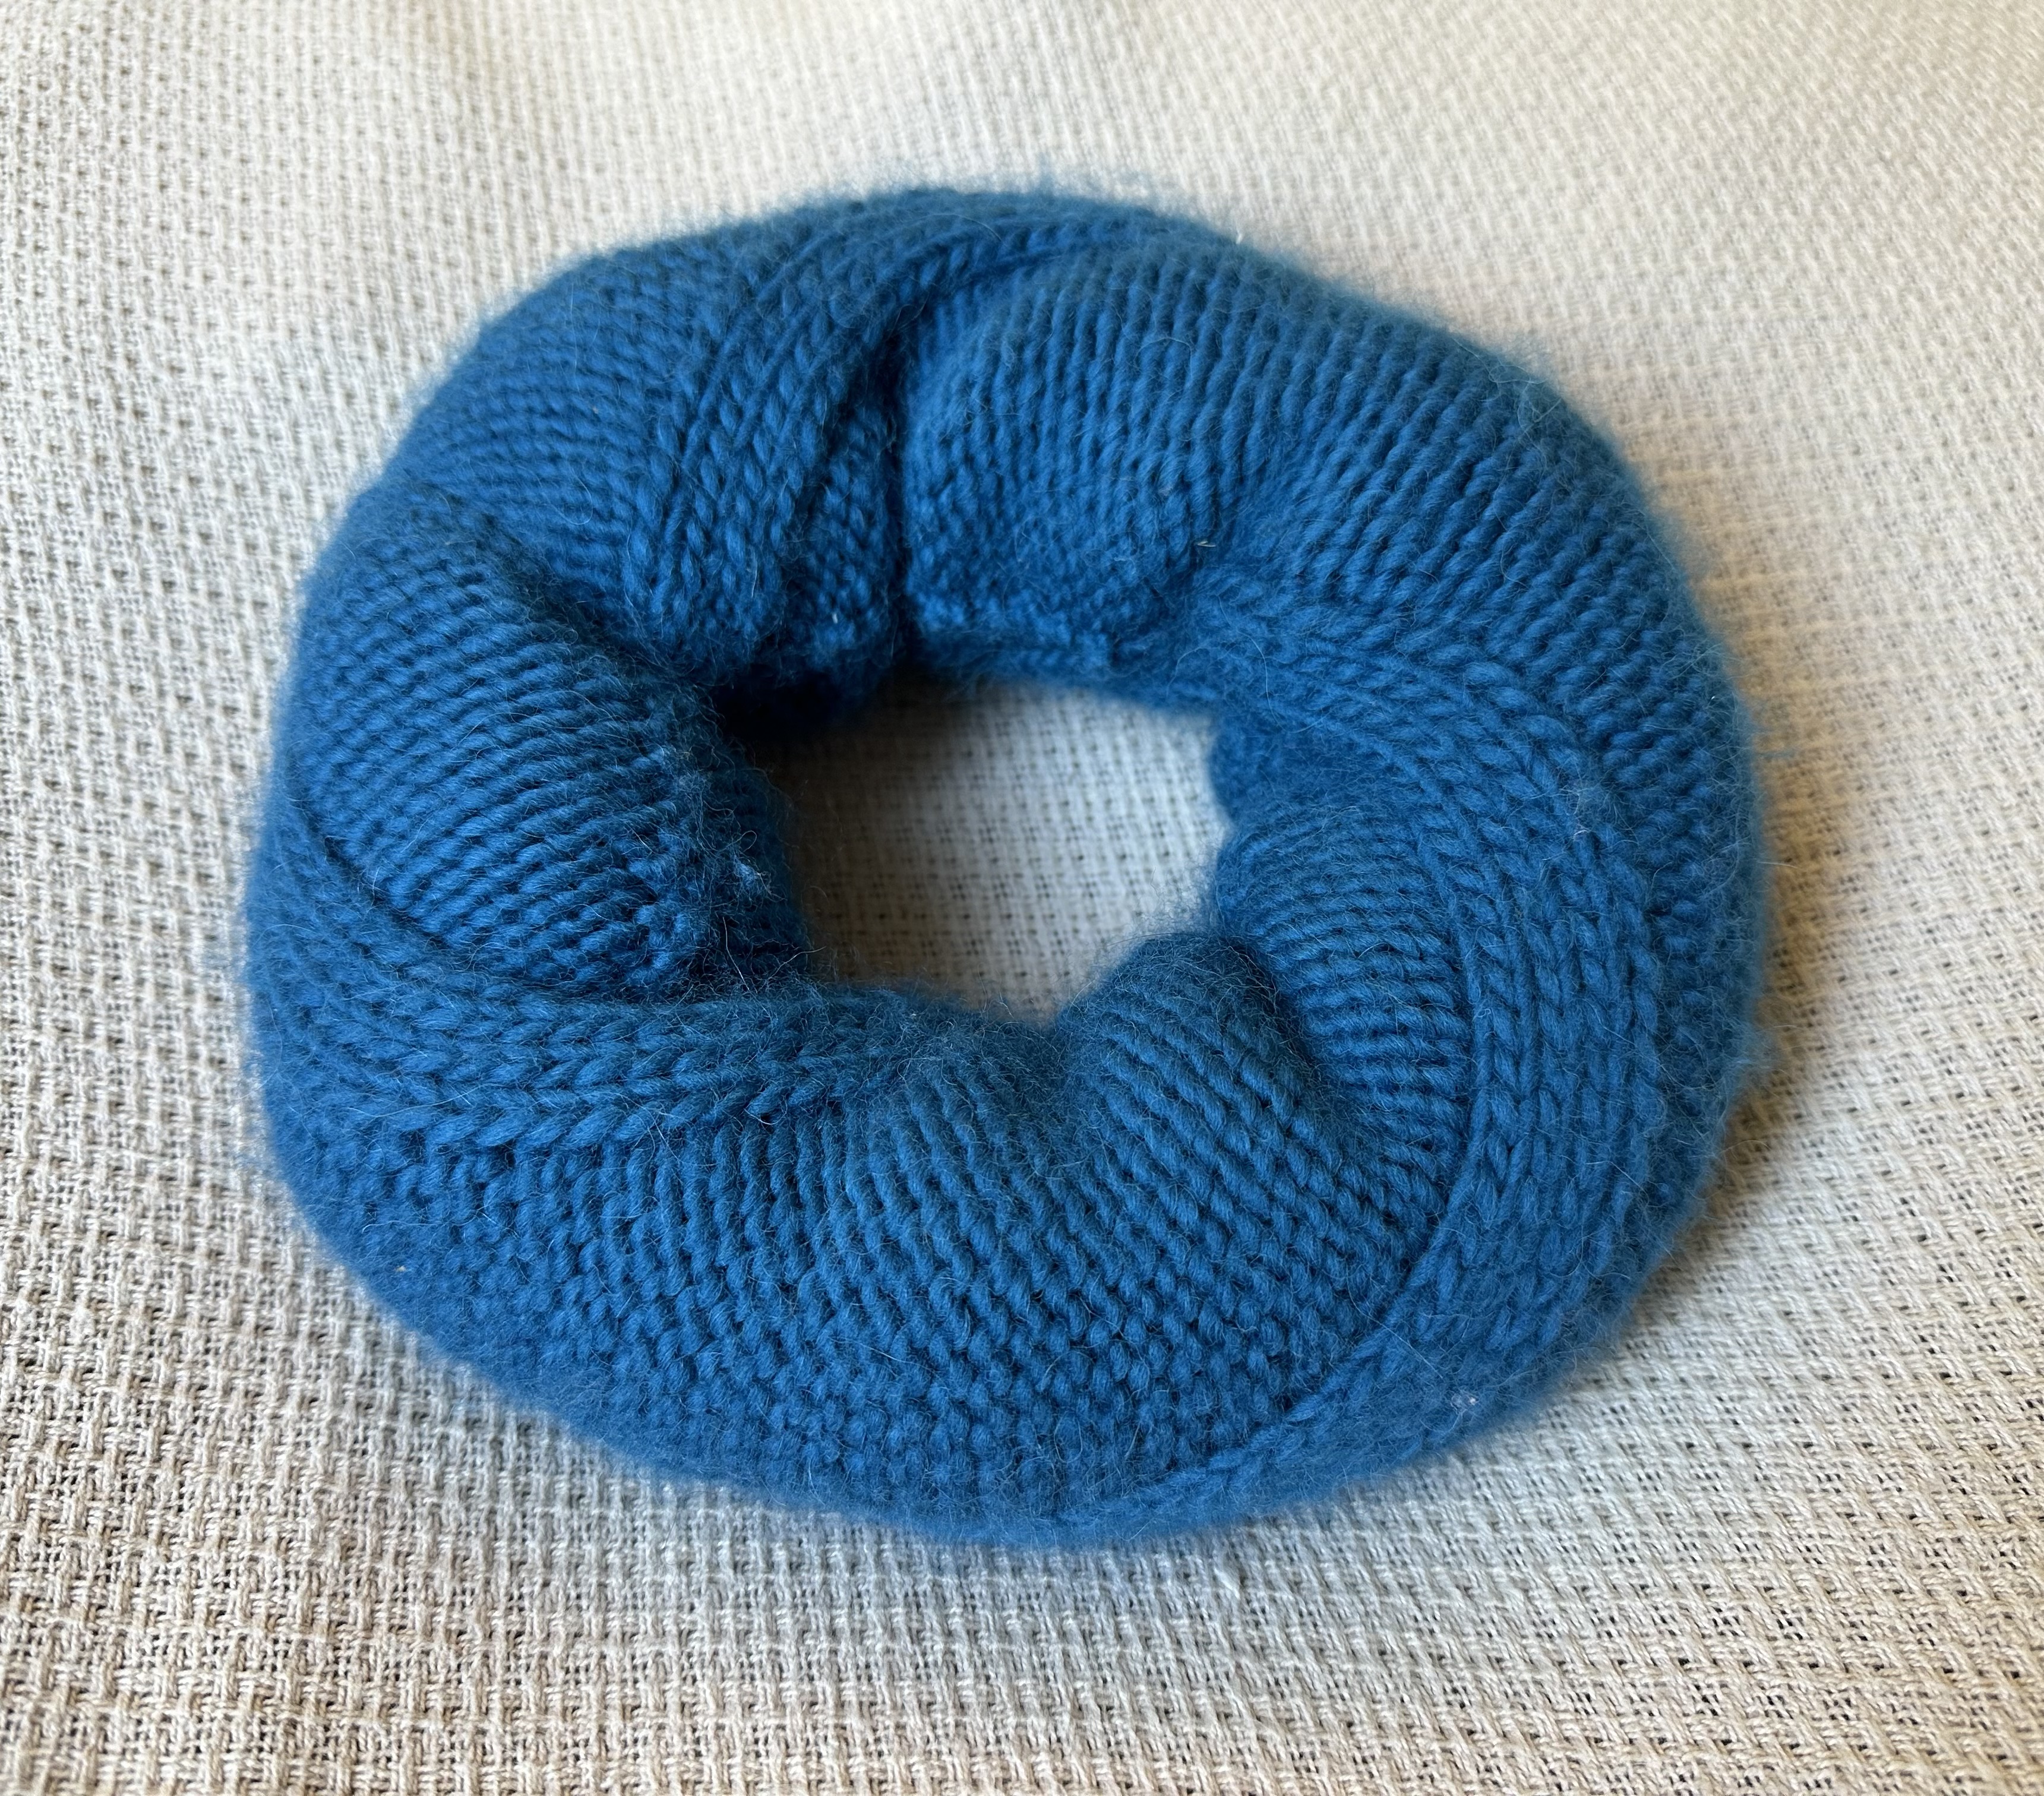
Blue Torus. Outer diameter: 3.75in. Inner diameter: 1in. Method: rectangle. A small test to see if my interpretation of the rectangle method worked. The dark yarn and my inexperience made the process challenging.
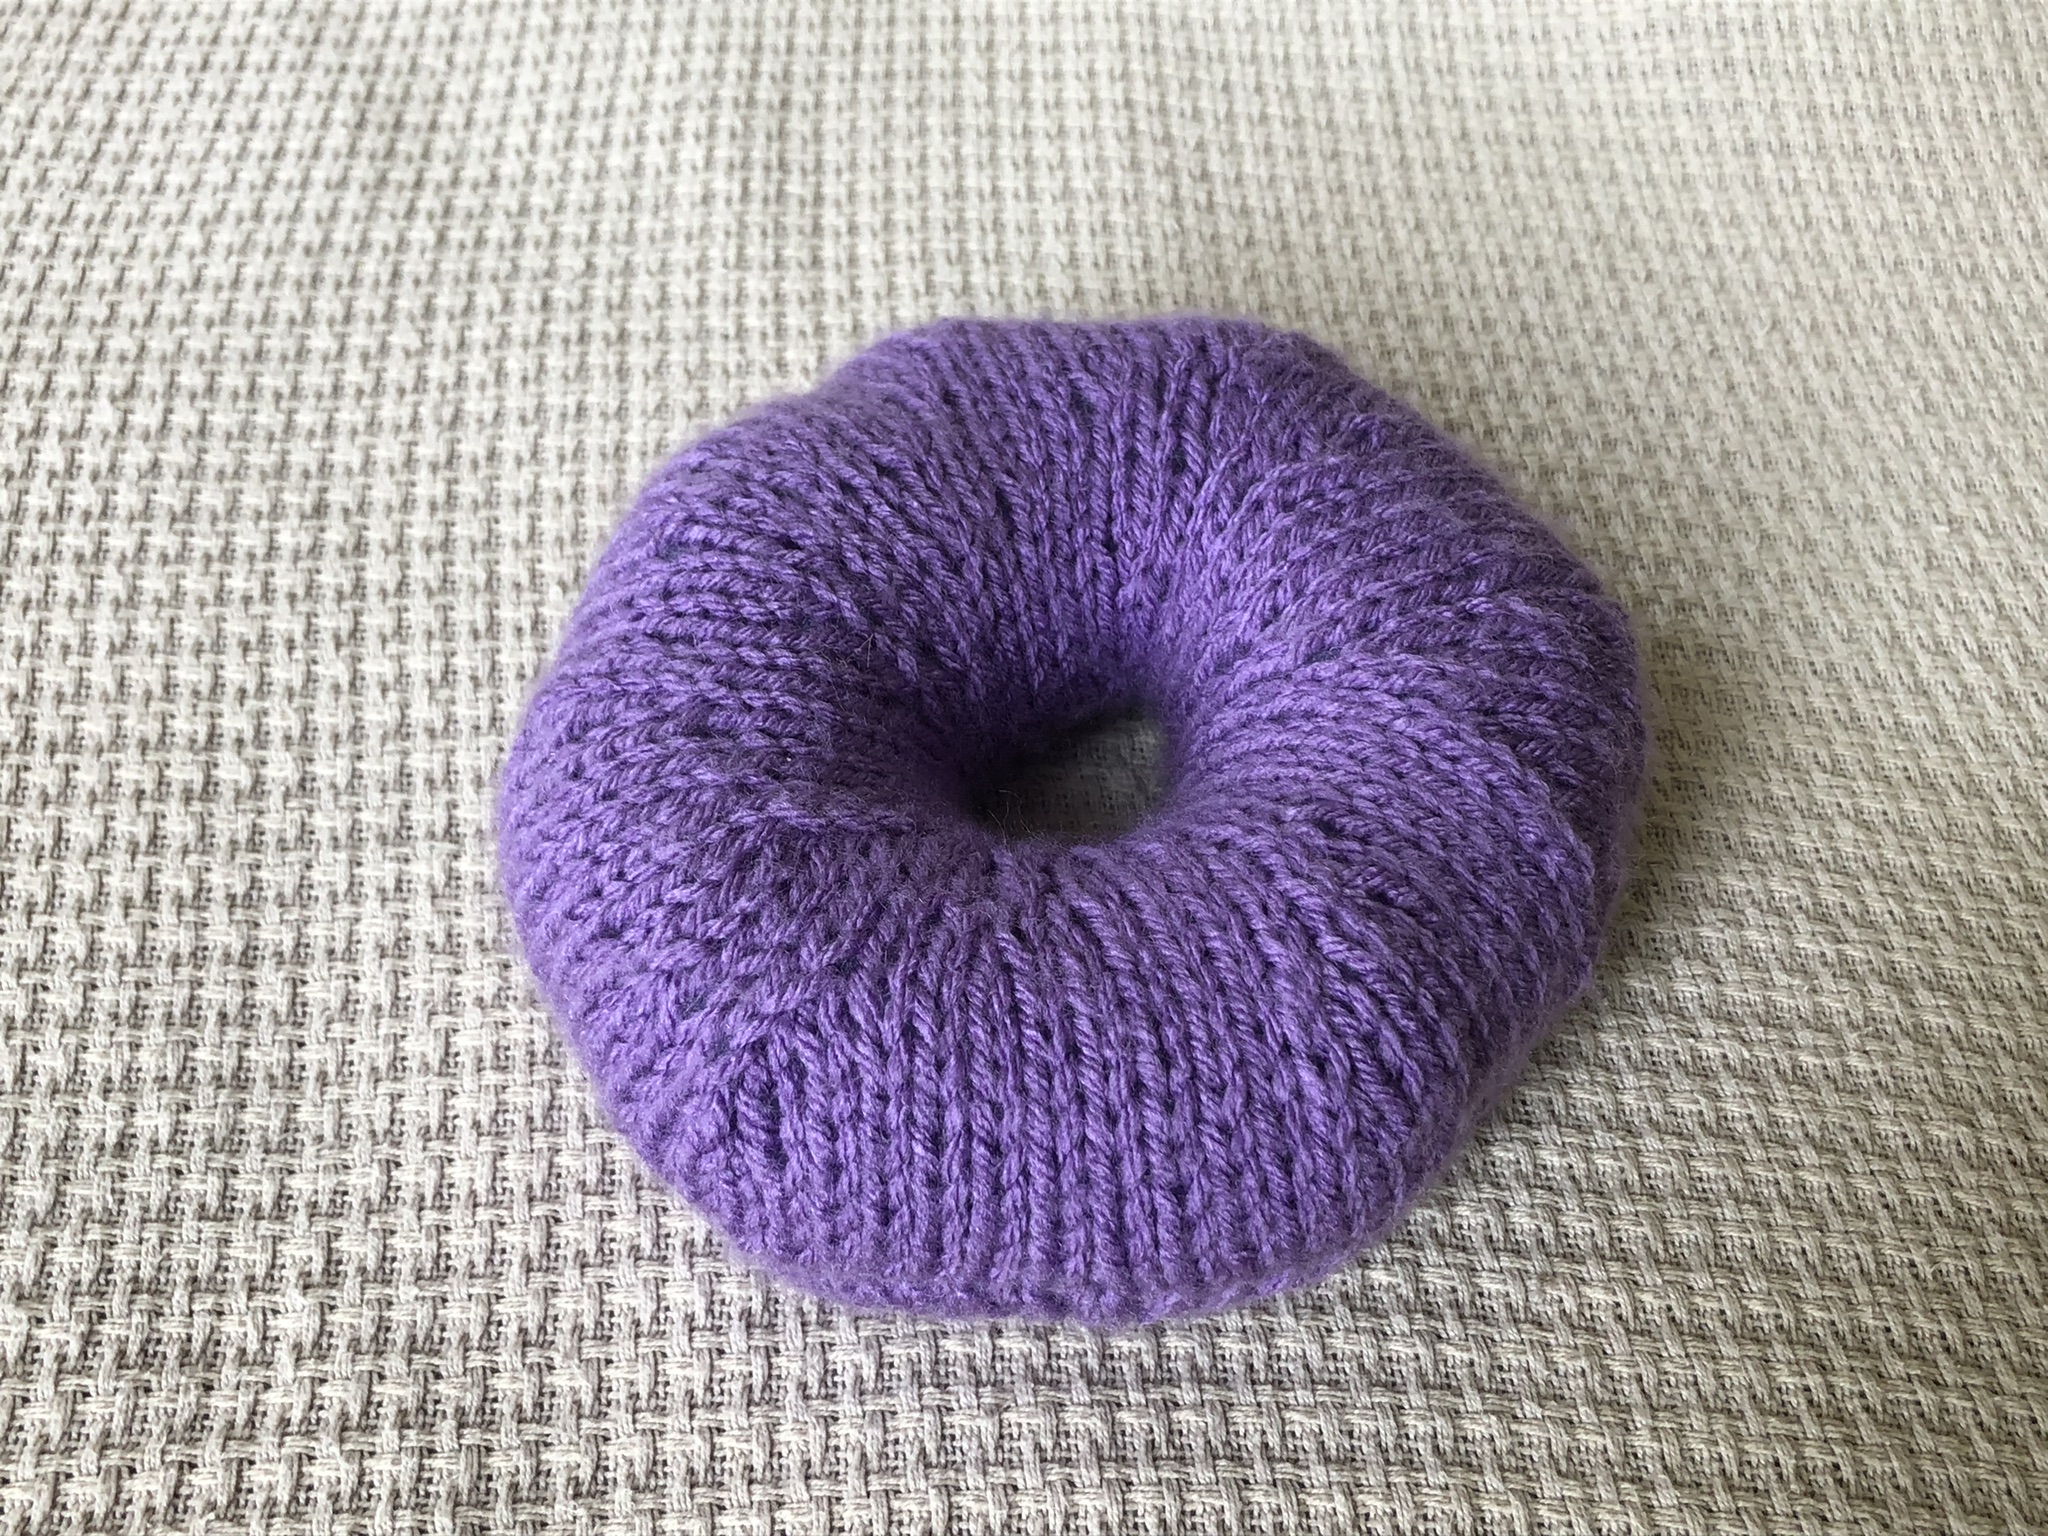
Purple Torus. Outer diameter: 6.5in. Inner diameter: 1.5in. Method: trapezoid. Honestly pretty good! The main problem is that I understuffed it.
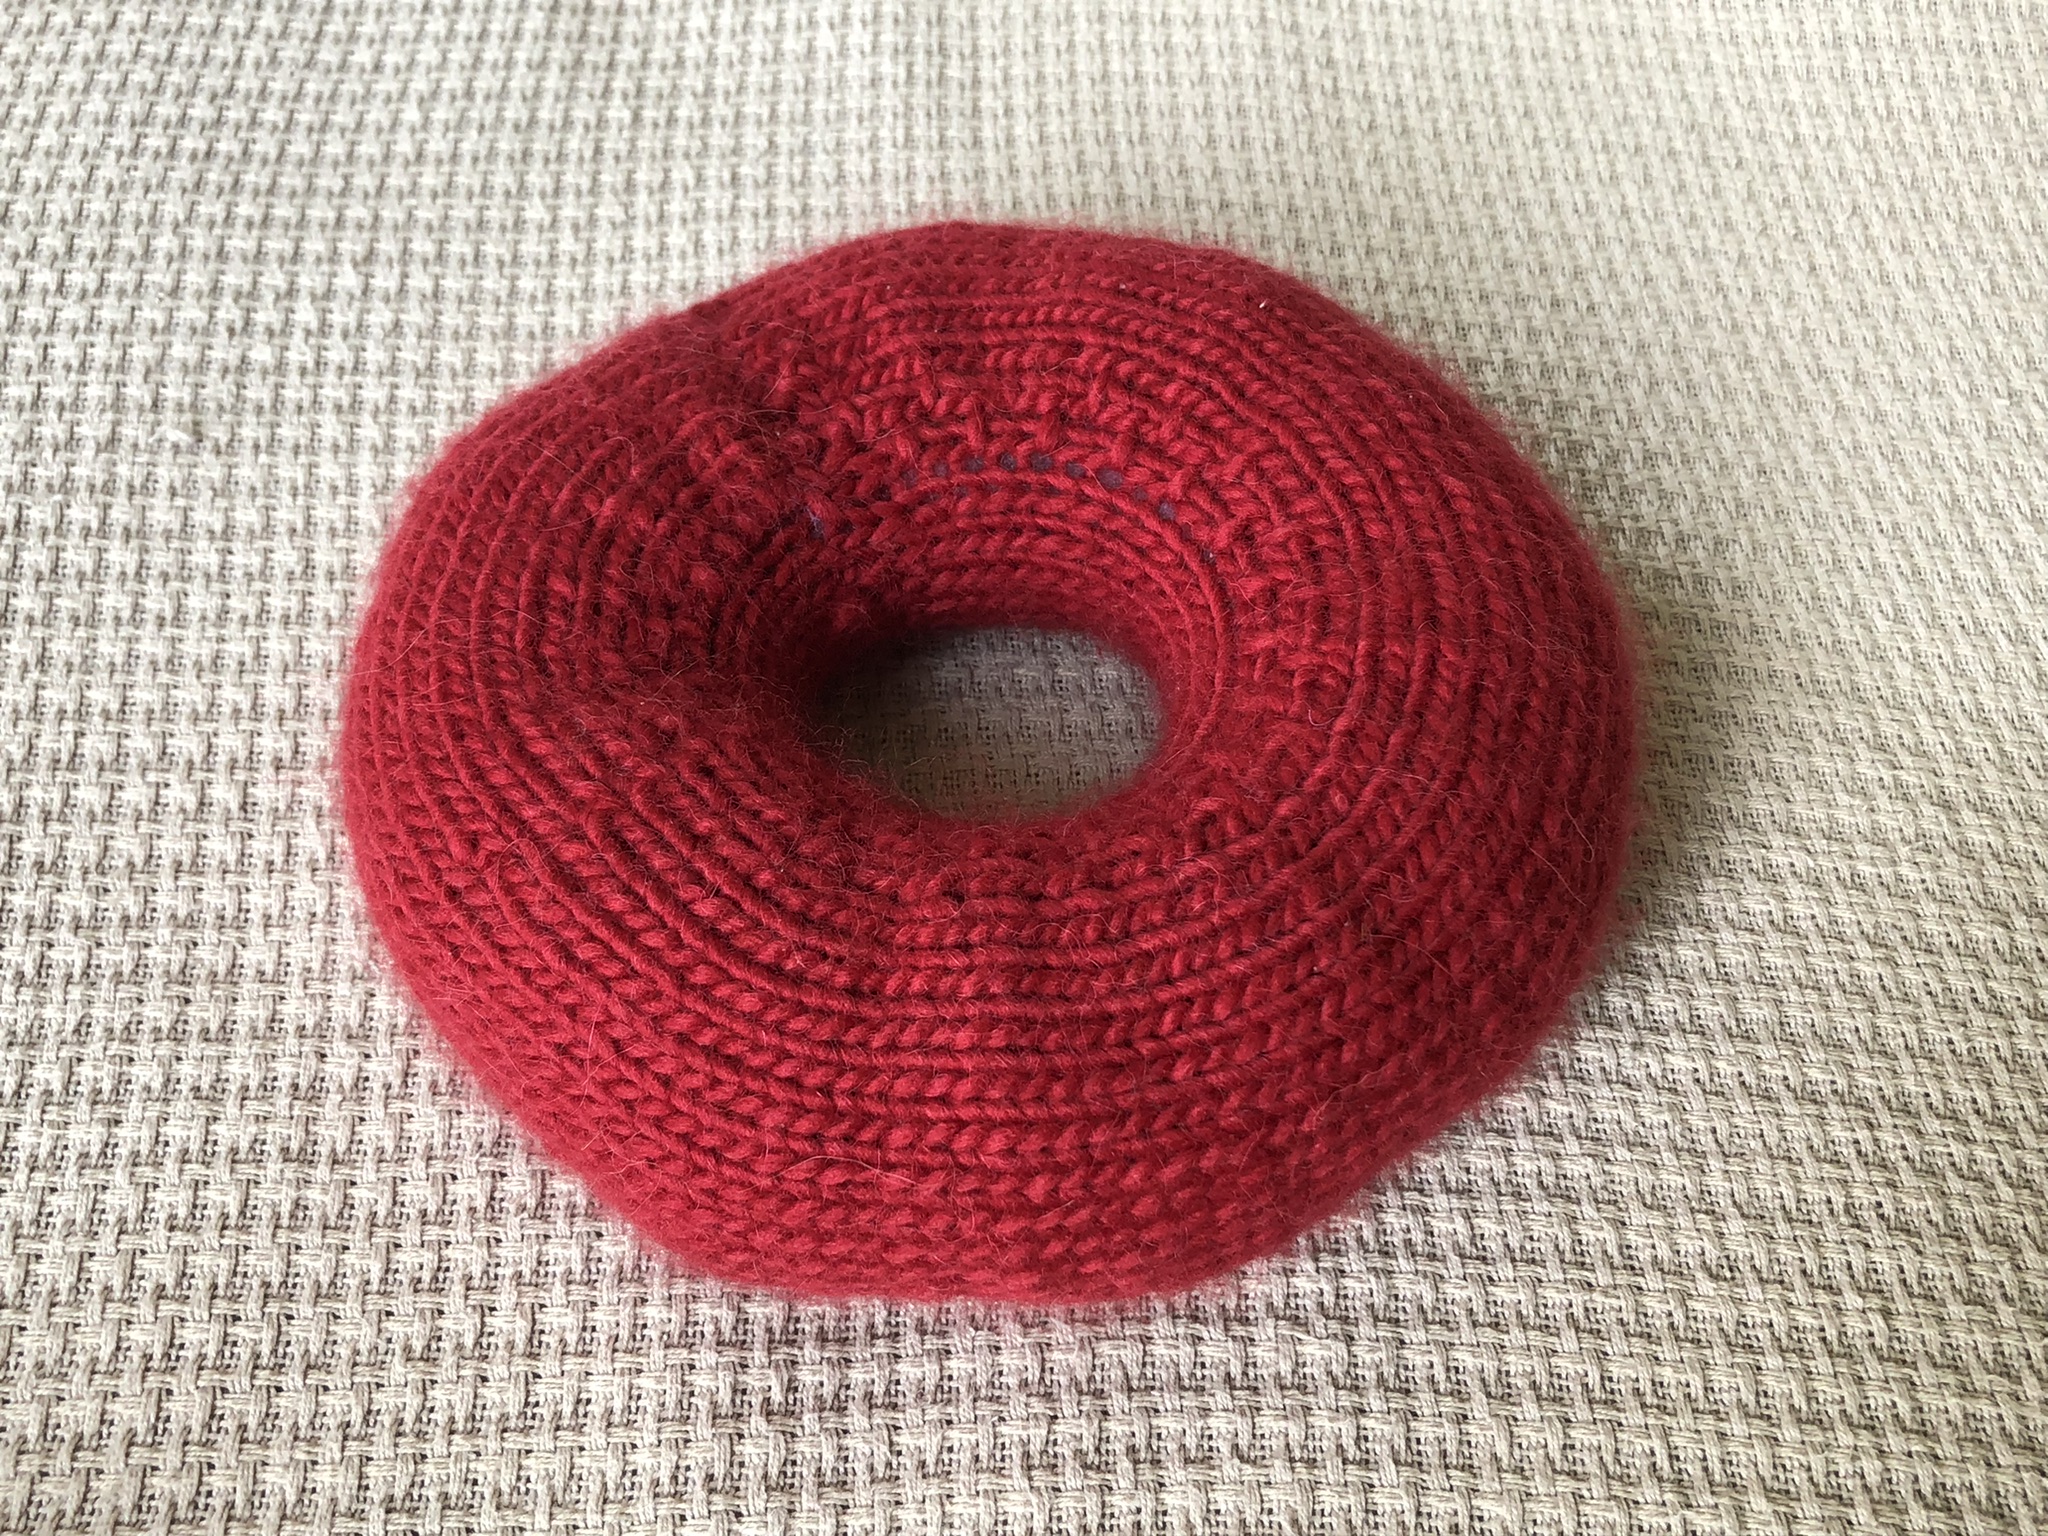
Red Torus. Outer diameter: 8in. Inner diameter: 2.5in. Method: rectangle. The first torus I made. I hated using the short rows/rectangle method, but it's one of my faves due to its size.
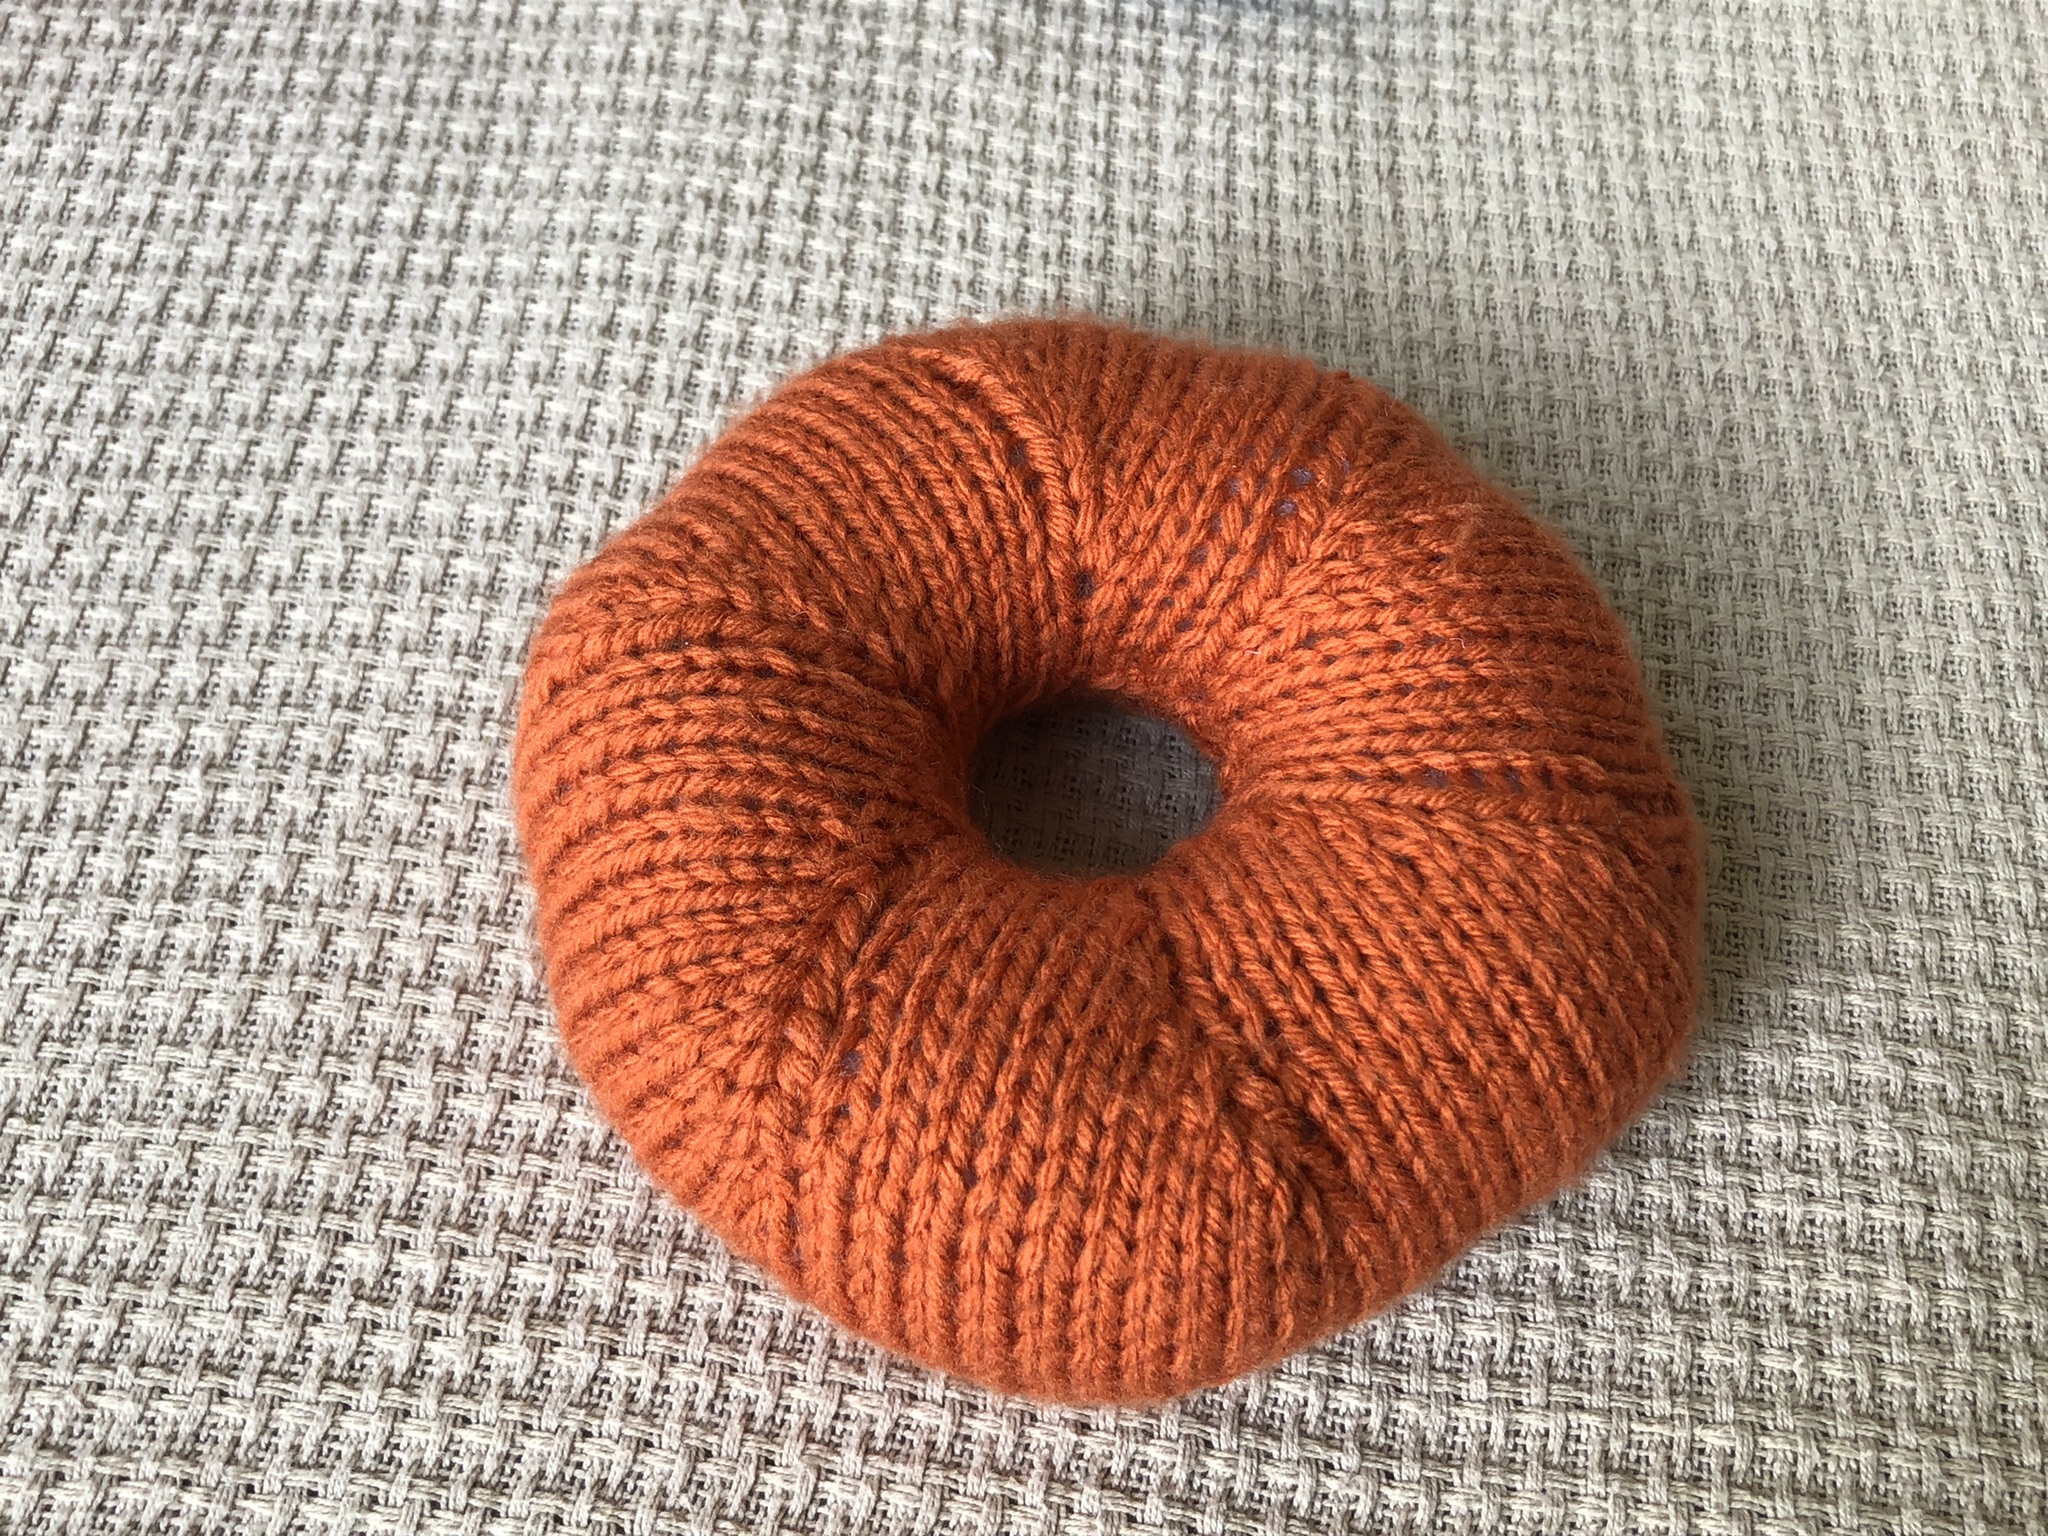
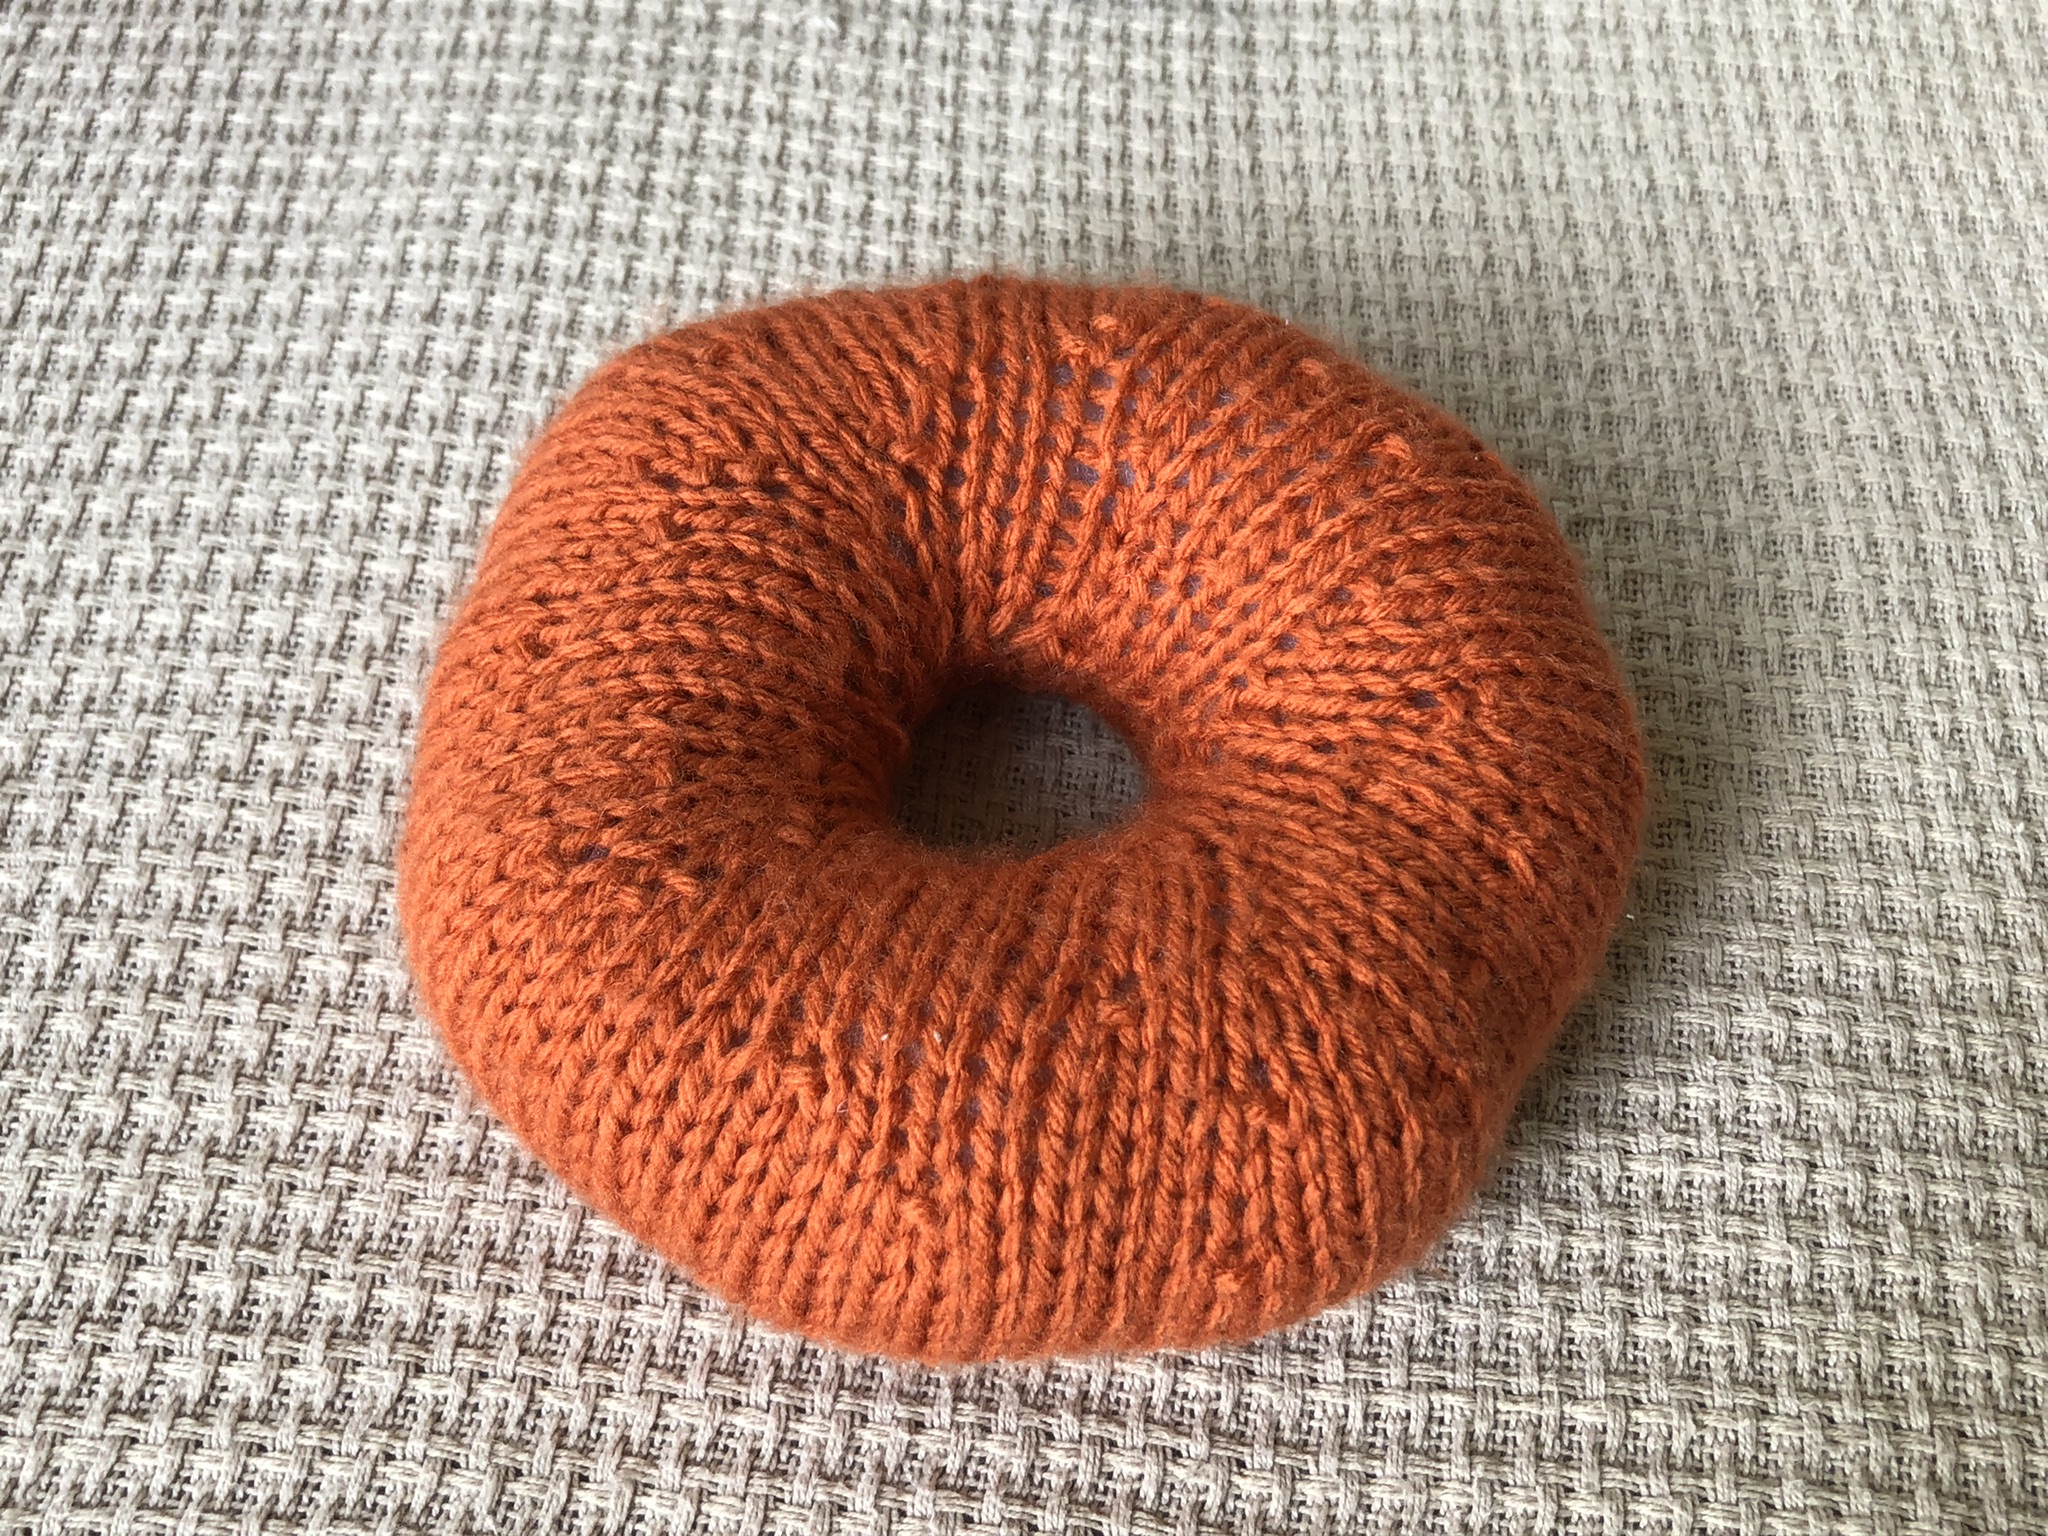
Orange Torus. Outer diameter: 6in. Inner diameter: 1.5in. Method: trapezoid. I tried experimeting with where to place the increases/decreases, and I hate the final result. Those lines? So ugly. Never again.
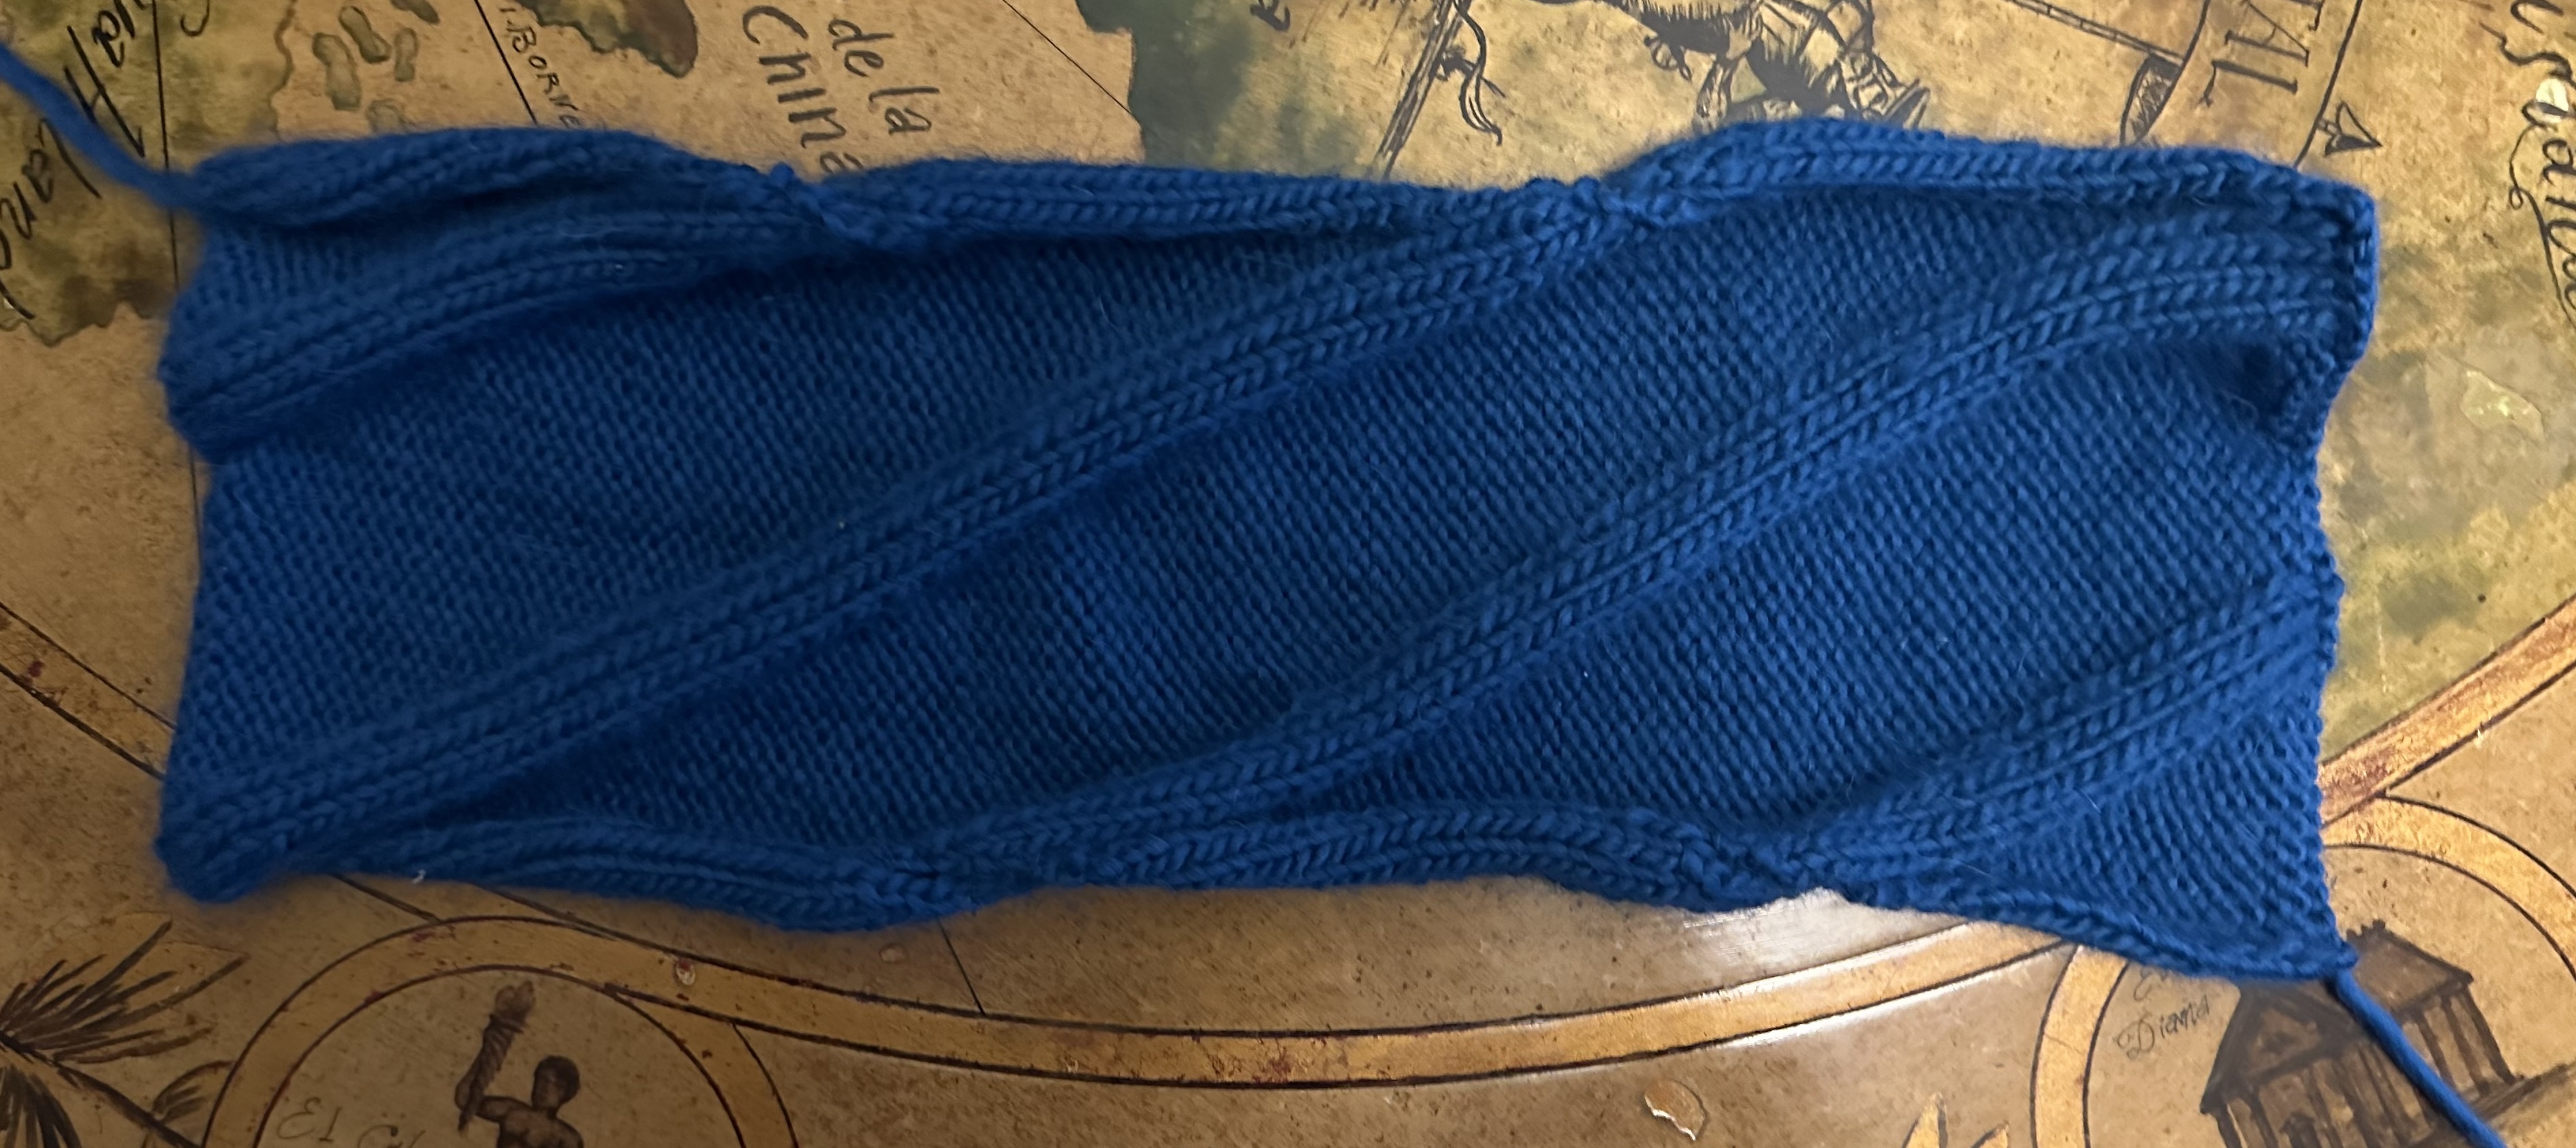
Teal Torus with Trefoil Knot. Outer diameter: 9in. Inner diameter: 3in. Method: other. After attending a talk by Juanita Pinzon-Caicedo, she taught me that a knot can be embedded on a torus by way of the diagram below:
I set out to recreate this diagram with knitting. I didn't want to spend too long translating the diagram into one of the two methods below, so I opted to just make one large rectangle, and live with the fact it wouldn't be perfectly smooth. I used cabling in stockinette to make the knot, and reverse stockinette for the rest.
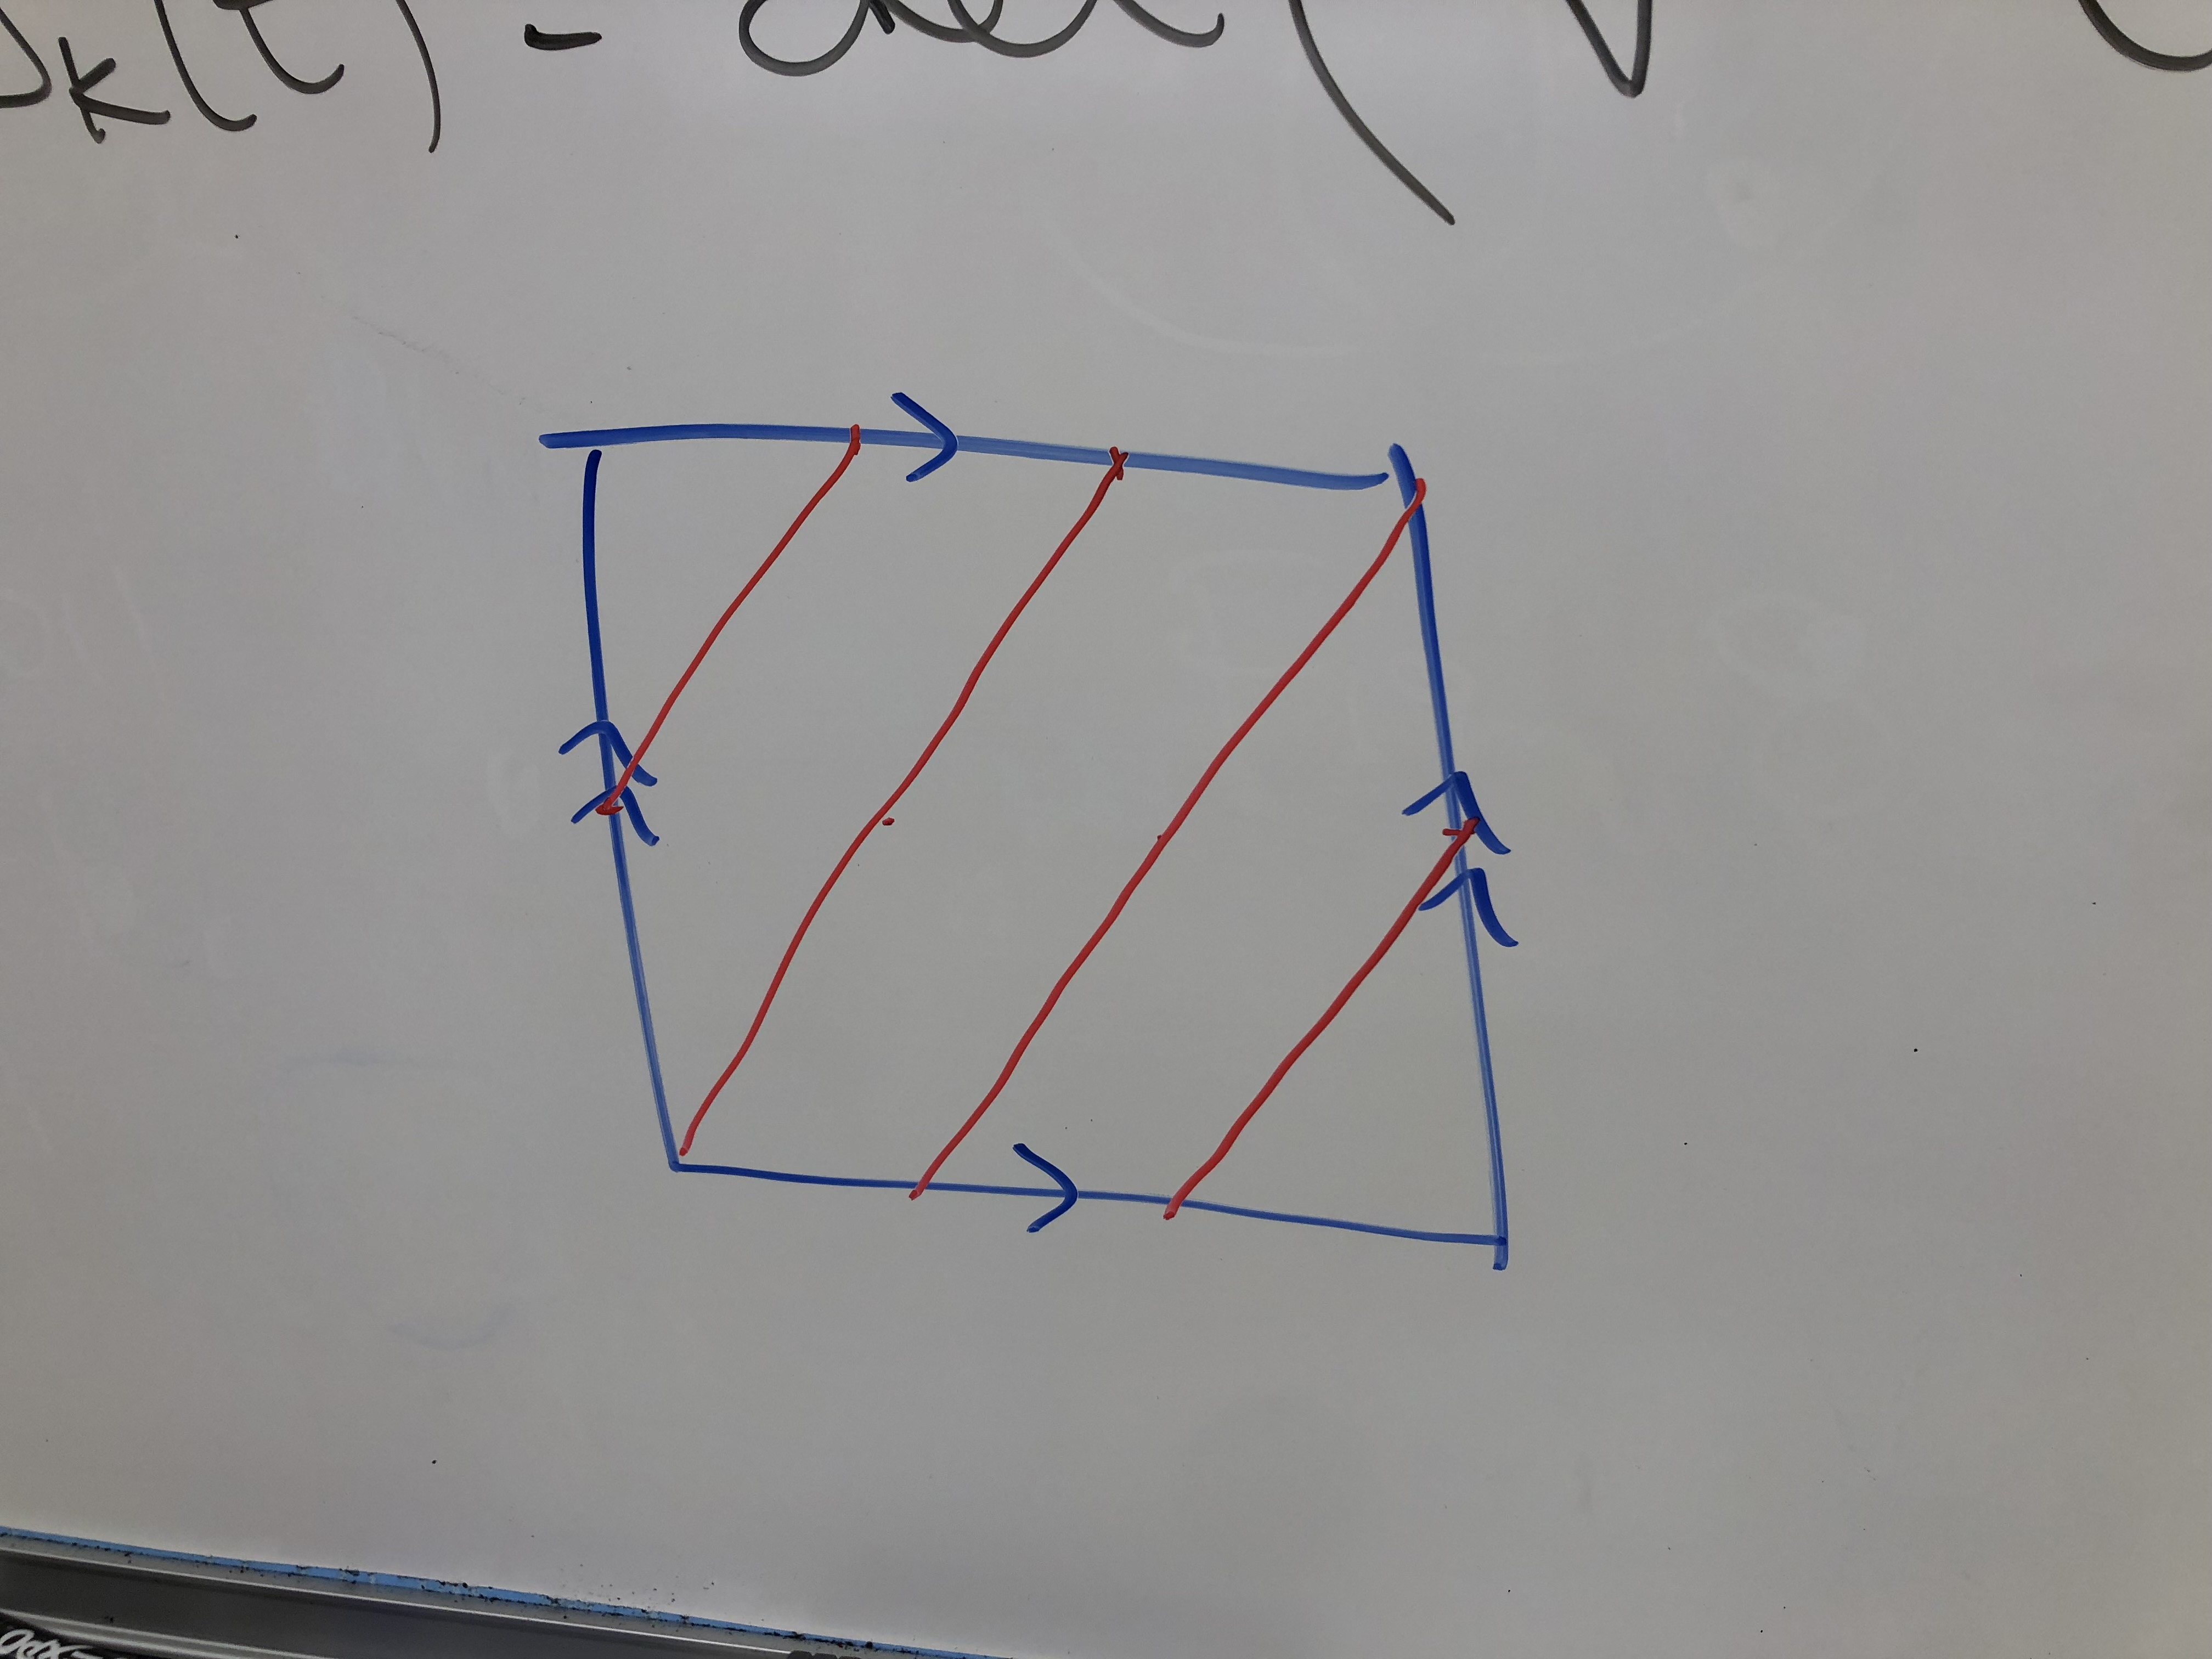
So far, I'm aware of two fairly flexible methods of knitting a torus. I'll be assuming that you know how to construct a torus using a gluing/identification diagram, as that's what I'll use to demonstrate the two methods.
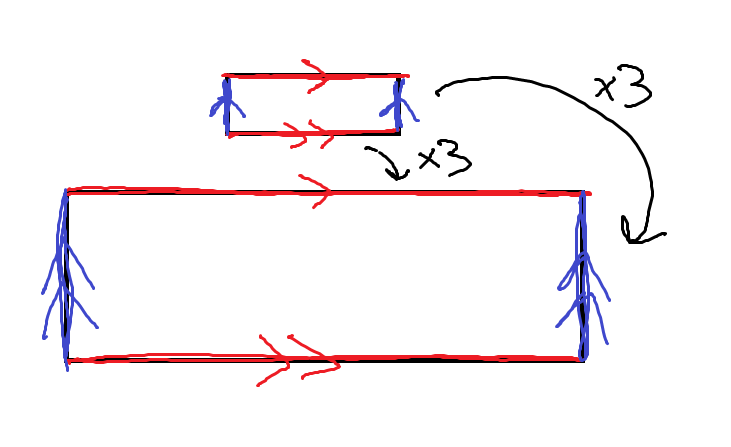
In order to make a torus using this method, you must make two rectangles, with one being 3 times the length and width of the other. For each rectangle, identify the shorter ends together to create 2 loops with no twists. The larger loop will act as the outer circumference, and the smaller one will be the inner circumference. Additionally, the combined widths of both loops will make the circumference perpendicular to the other two. Using the pliability of the knit fabric to our benefit, we now identify the sides of the loops together, creating a torus. Thus we mainly see the larger loop from most angles, as the smaller loop is hidden in the center hole, making up a fraction of the total surface.
PROS: Simple to knit, as rectangles are the easiest shape. If you wanted to make a pattern on the torus, it would be easy to apply to the rectangular pieces.
CONS: The grafting along the edges of the loops is difficult to manage, as one stitch/row on the smaller loop must correspond to 3 sts/rows on the larger loop.
Source: This method was introduced to me in Making Mathematics with Needlework using short rows in the round to knit make a tube, which took care of the red identifications without sewing. However, I hated working it that way, so I made the two rectangles method shown here to see if that worked as well, since they are the same process in principle. It's up to you which way you like better.
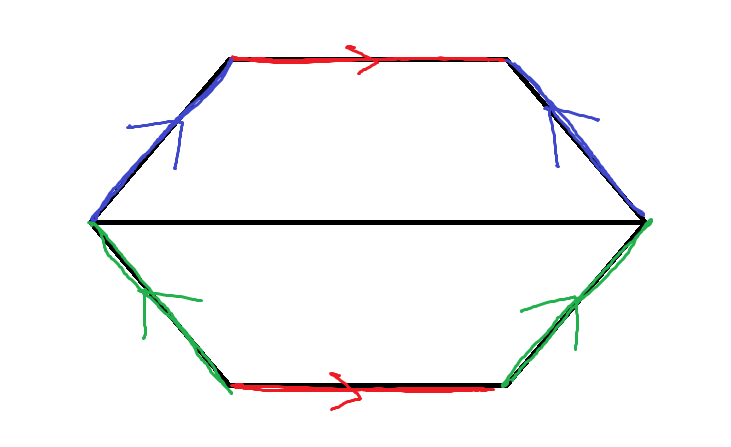
To begin, cast on enough stitches to make the inner circumference (red line). Then, knit as many rows needed for half the perpendicular circumference, while increasing enough to make the outer circumference (black line). Then knit the rest of the perpendicular circumference, decreasing to return to the original cast on amount. Then, identify the red lines, then the blue and green. Alternatively, you can rearrange the knitting steps, so that you start with the outer circumference, decrease to the inner one, then increase to the outer one again. Both gluing diagrams are the same.
PROS: There is a generator for any size of torus you want (below), and the knitting is only one piece!
CONS: Knowing where to place the increases/decreases is difficult (see my orange torus), and the variation between to amount of stitches on your needles for the outer and inner circumferences can be a difficult battle.
Source: This lovely generator provides exact instructions for the flipped version I mentioned. I prefer having too many stitches on my needles rather than too few, so I take the instructions, and flip them to look like my diagram.